Getting the right server hardware for camera artificial intelligence
You can run Debian Linux on any almost any standard PC hardware. For a simple CAM-AI server with no more then 2 cameras every halfway recent PC will do. For servers with more cameras you need a powerful PC. A possible configuration for a server hosting 10 cameras could be this:
- Mainboard: Asus Prime X570-Pro
- Prozessor: AMD AM4 Ryzen 9 3900X, 12×3,80GHz
- Processor Cooler:”be quiet!” Dark Rock Pro 4 135mm Silent
- RAM: 64GB DDR4 3200
- HD: 2 x 4 TB 3.5, two HDs to configure a software RAID (see description how to do this)
This is an example, taken from one of our servers. Different hardware will also do…
Getting the right operating system
We recommend installing CAM-AI on a freshly installed Debian 12. Get the ISO image here and write it to an USB stick following these instructions. Launch the boot from your USB stick in your BIOS setup.

Select Graphical Install.
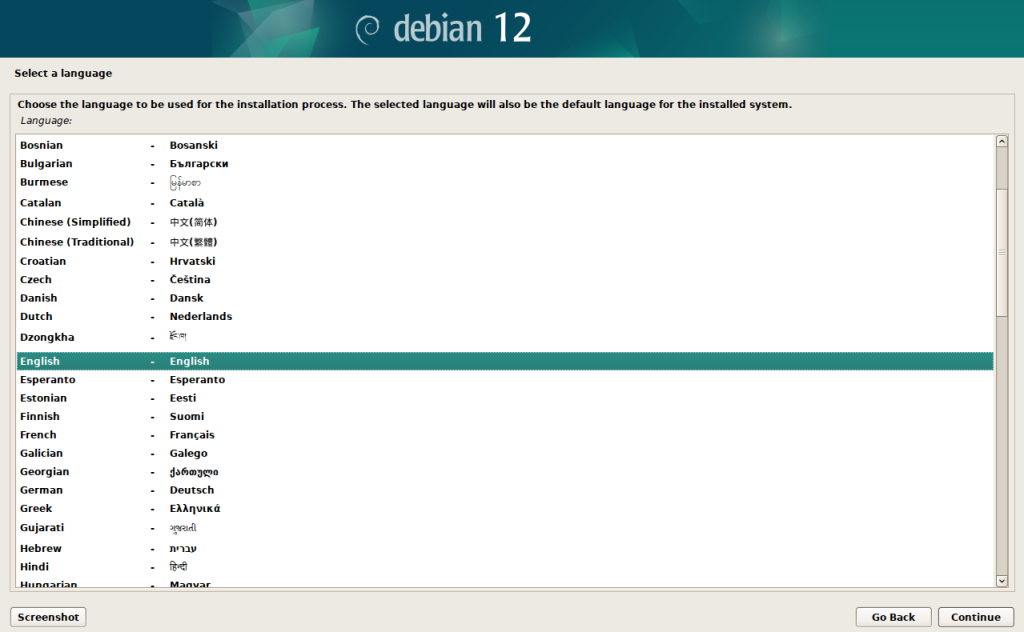
Select the language of your choice. Answer the questions about your location and keyboard on the following screens according to your setup.
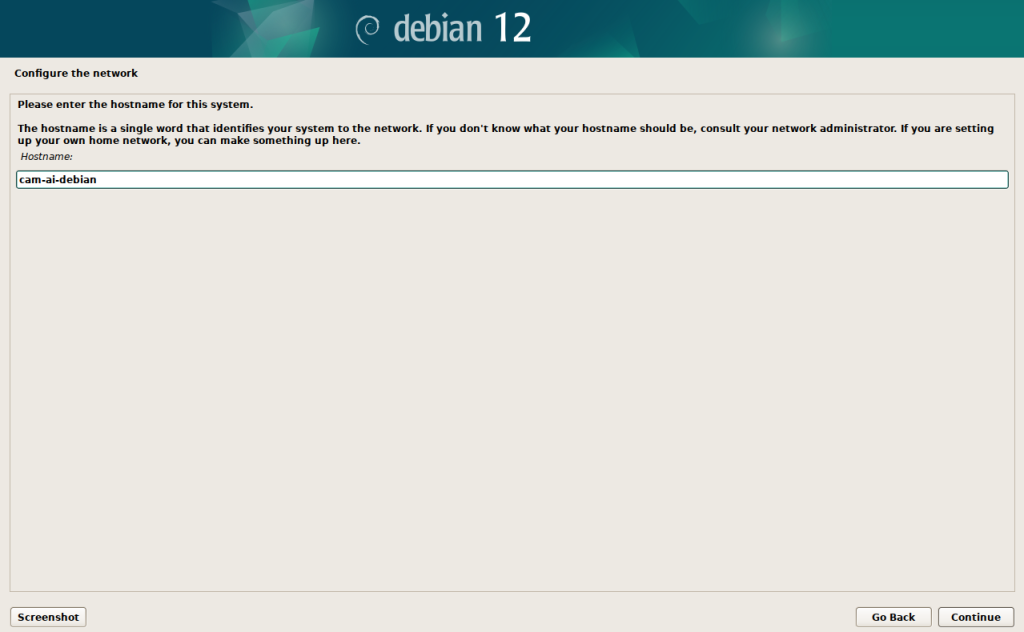
Give your server a name. We recommend to follow our example. On the next screen you can leave the domain empty.
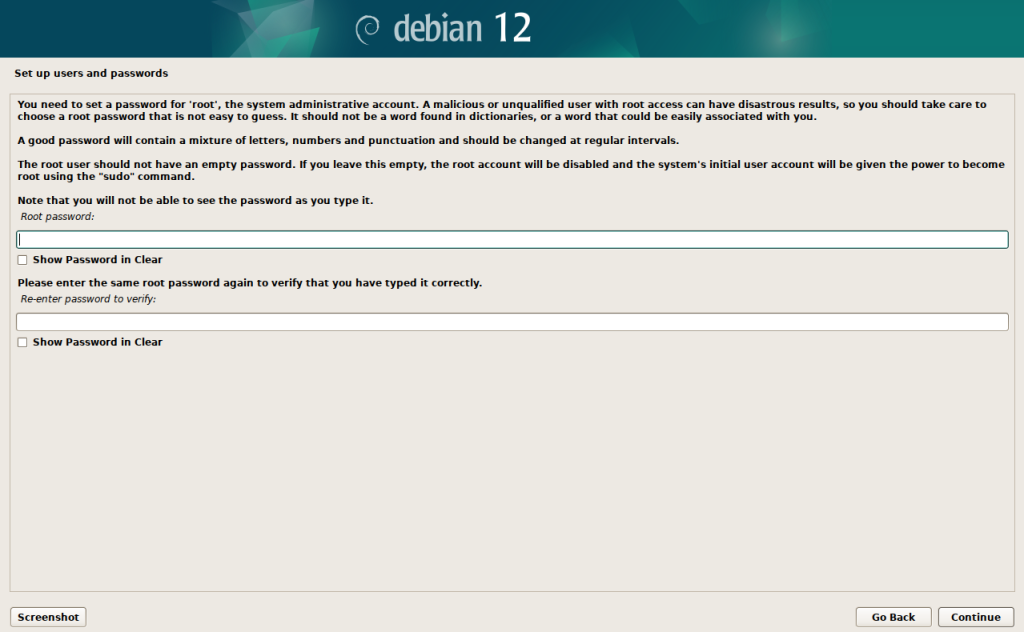
Define the root password of your server, write it down, you will need it later.

Introduce a new user with the name cam_ai. On the following screen, enter cam_ai again.
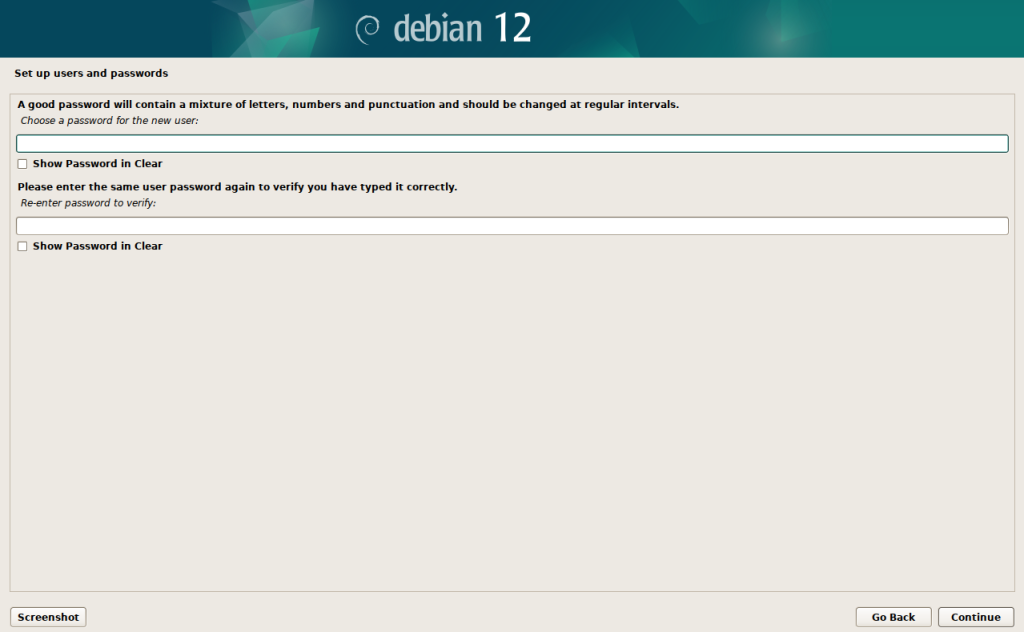
Define that users password, write it down, you will need it later. If you selected a country earlier that has more the one time zone you will be asked to choose one on the next screen.
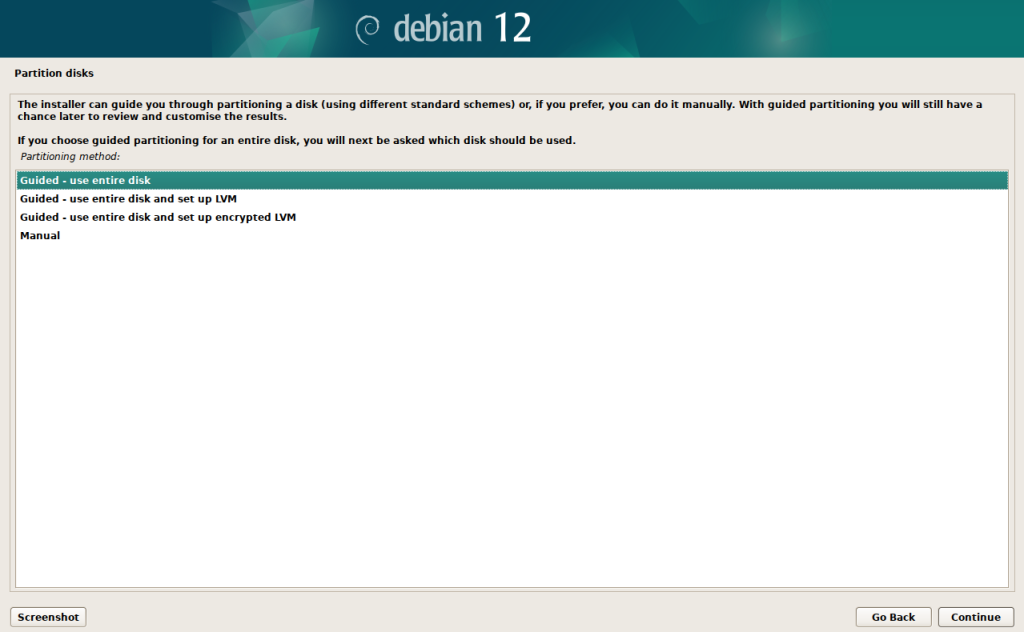
We select the easy way of disk setup.
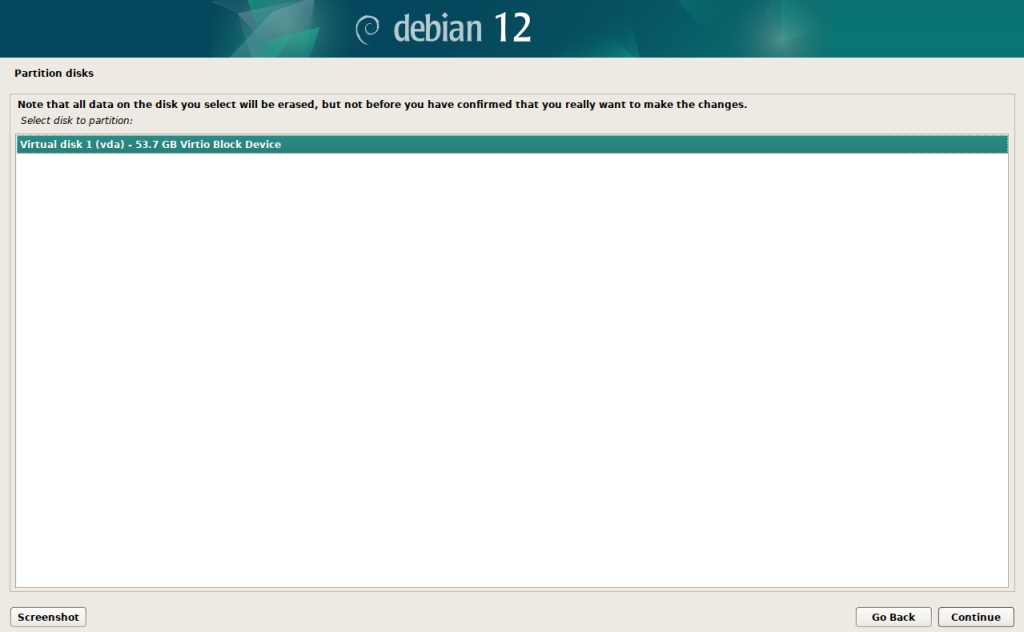
Make sure you select the right hard disk to install debian on. In our example it is a virtual disk. Yours should look different, more like real hardware…
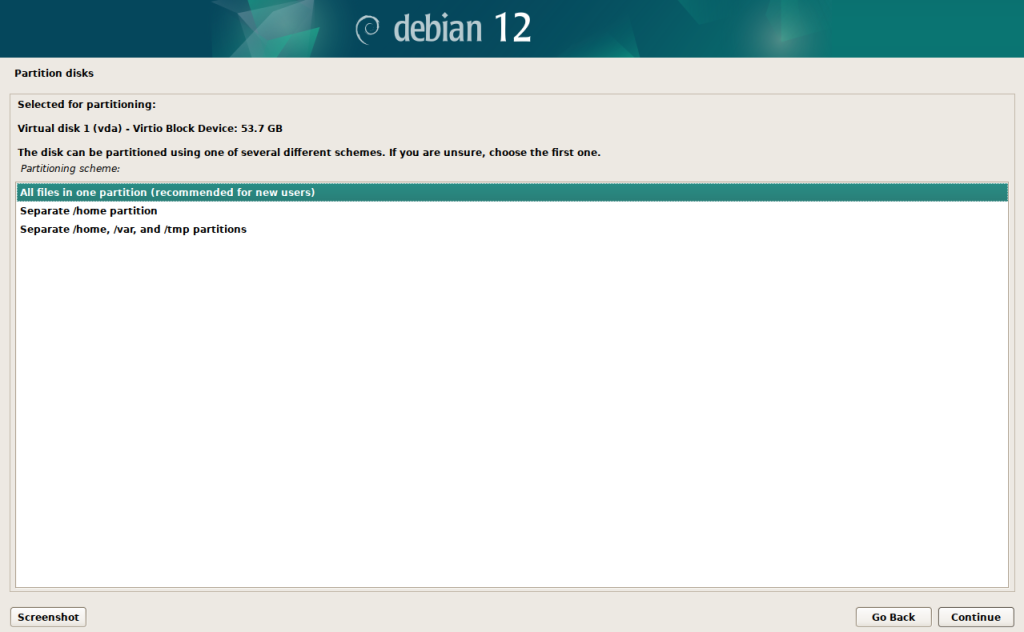
Again, for now we choose the easy way.
Same here…

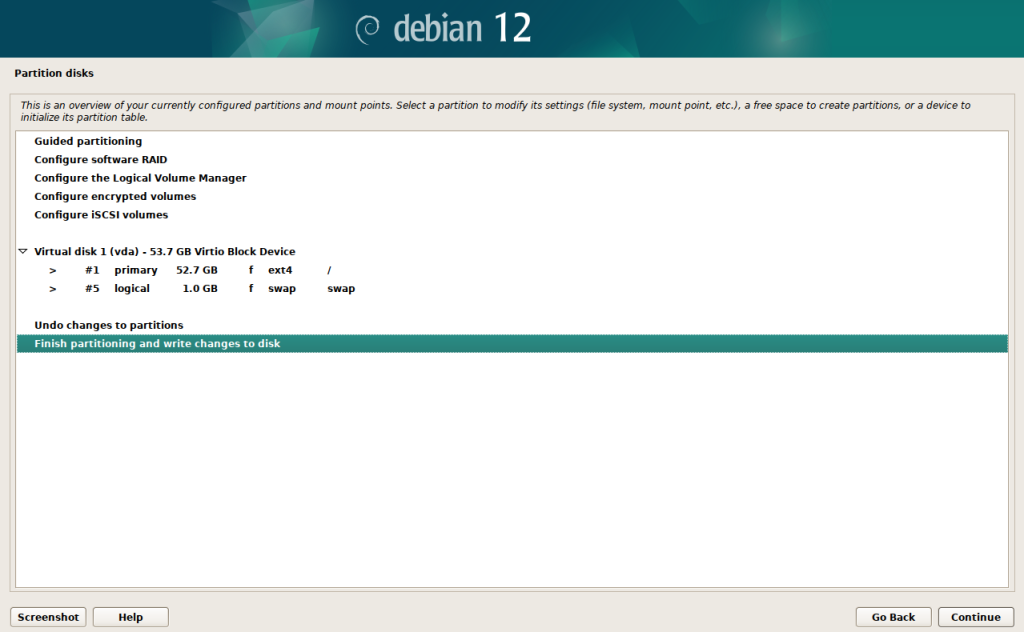
We click on “Yes” and then on “Continue”. The next step while last a while…
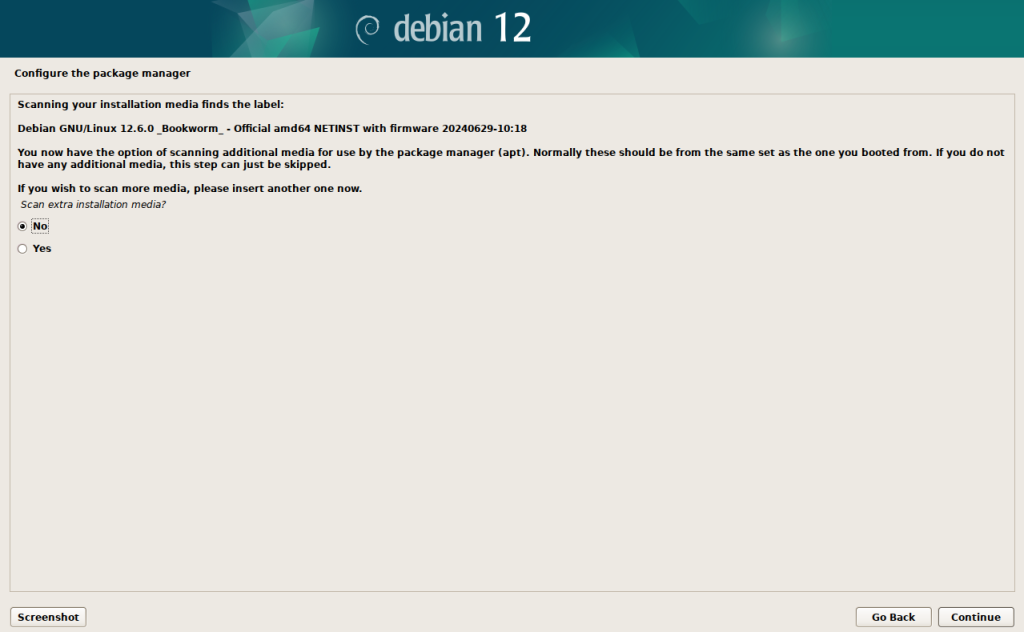
No more media, “Continue”. On the next two screens you select the server for updates and new installations. We use to choose deb.debian.org because that works well. All the others should be OK also :-). If you are not behind a proxy, you can leave the proxy field on the next screen blank. Again, the next step will take a while. Once more click on “Continue” for the popularity contest.
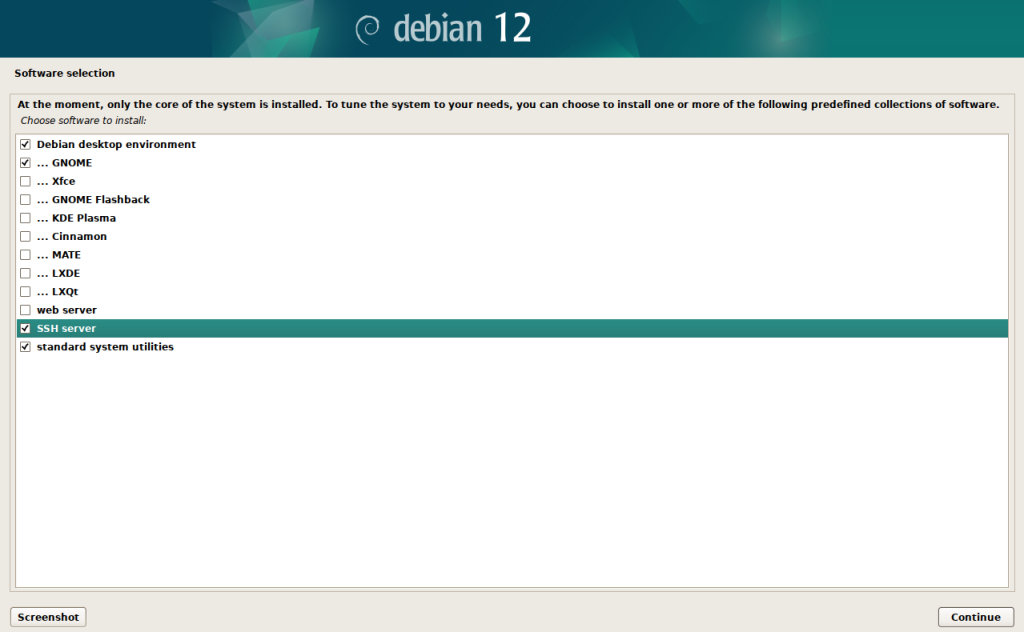
Make sure you select the installation of SSH server if you plan to access your server from remote. This is not the default. And again, you have to wait for a couple of minutes.
Yes, “Continue”…

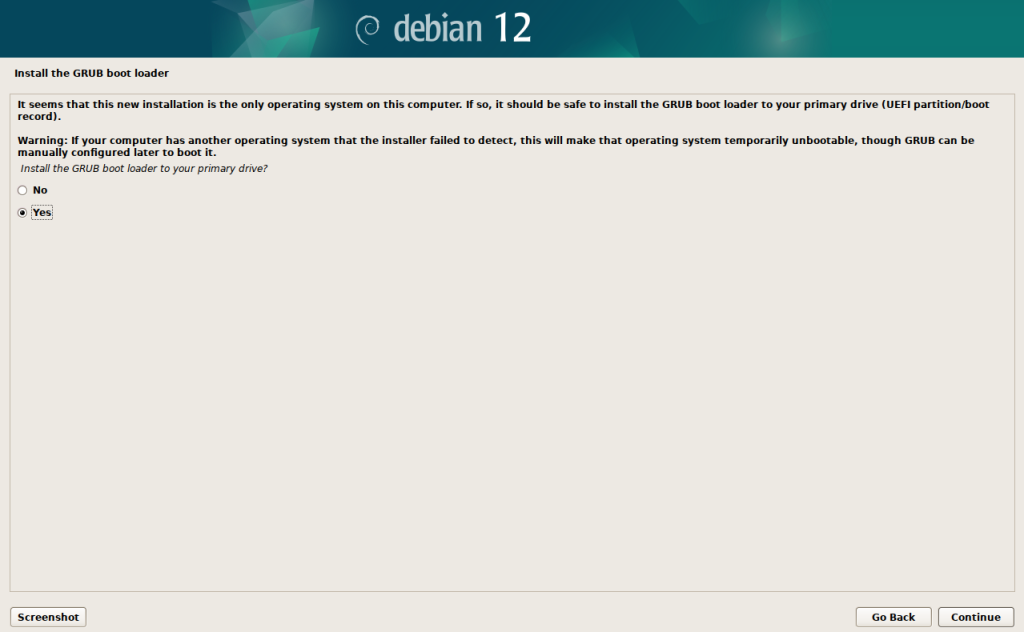
Install the boot manager on the right harddisk. If you have only one HD as in our example, the choice is easy. The installation is now complete. From the next screen you choose “Contiue” to reboot. Then you log in as user cam_ai (remember the password? ;-).
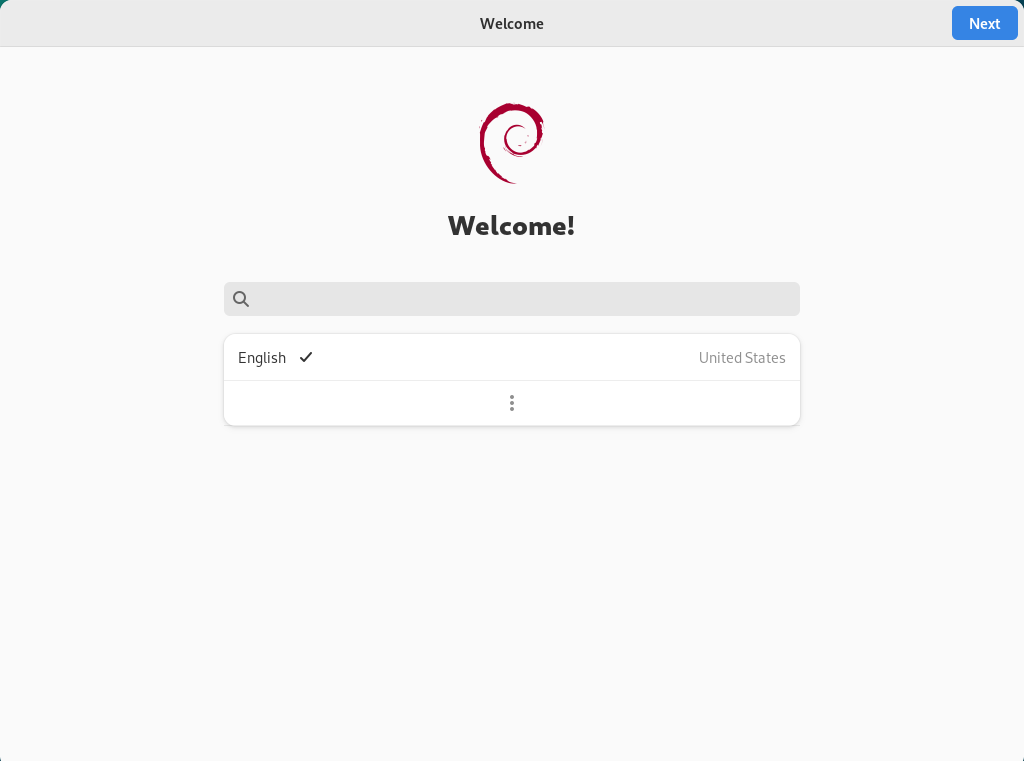
On the first boot you get a couple of questions from the fresh debian. You can skip all these by clicking “Next” or “Skip” or “Start Debian”.
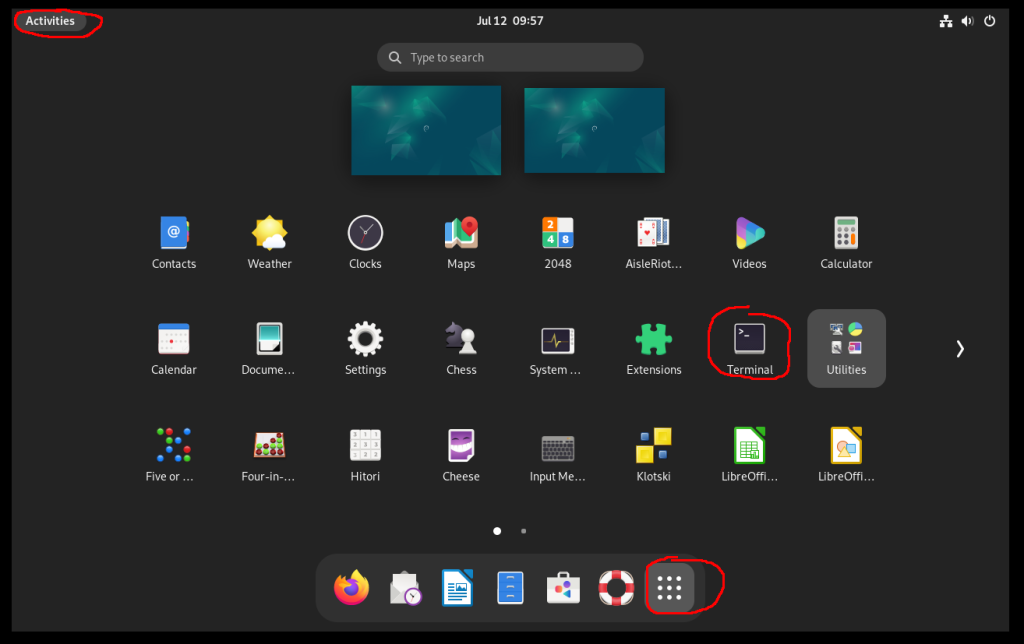
Now you click on “Activities” (top left) and then on the nine dots (bottom right). Then you open a terminal to continue setting up. Enter the following lines.
mkdir -p ~/miniconda3
wget https://repo.anaconda.com/miniconda/Miniconda3-latest-Linux-x86_64.sh -O ~/miniconda3/miniconda.sh
bash ~/miniconda3/miniconda.sh -b -u -p ~/miniconda3
rm -rf ~/miniconda3/miniconda.sh~/miniconda3/bin/conda init bash
source ~/.bashrcconda create --name tf python=3.12
su
/sbin/usermod -aG sudo cam_ai
reboot now
After the reboot you open another terminal (on the server or with SSH from a remote PC). There you can start the CAM-AI installation from your PC terminal (see this tutorial).