This is an installation tutorial for the CAM-AI Server on a Raspberry Pi 4 or 5 (Minimum 4 GB of internal RAM) with Raspberry Pi OS 13 (trixie) 64bit. For Raspi we recommend installing CAM-AI on a freshly installed Raspi-OS. You can prepare your Raspi (OS installation etc.) following the instructions in this separate tutorial.
Alternatively you can install the CAM-AI server on a PC with Debian OS Version 12. You can prepare your PC (OS installation etc.) following the instructions in this separate tutorial.
Continue here to proceed on any system:
First you configure a RAM-Disk for CAM-AI modifying fstab:
sudo nano /etc/fstab
At the very end of this file, you add the following line. When done, save and leave:
tmpfs /home/cam_ai/shm tmpfs defaults,size=256M,mode=0777 0 0
This is for automatic mount of the RAM-disk at the next reboot. For now you need to do the same thing manually later in this installation process.
sudo visudo -f /etc/sudoers.d/099_cam-ai
You add the following context to the empty file. When done, save and leave:
cam_ai ALL=(root) NOPASSWD: /sbin/shutdown

cam_ai ALL=(root) NOPASSWD: /sbin/reboot
Next is getting the CAM-AI installer program and launching it:
wget https://raw.githubusercontent.com/ludgerh/cam-ai/main/cam-ai-setup.pypython cam-ai-setup.py
This installation program will ask you a couple of questions first:
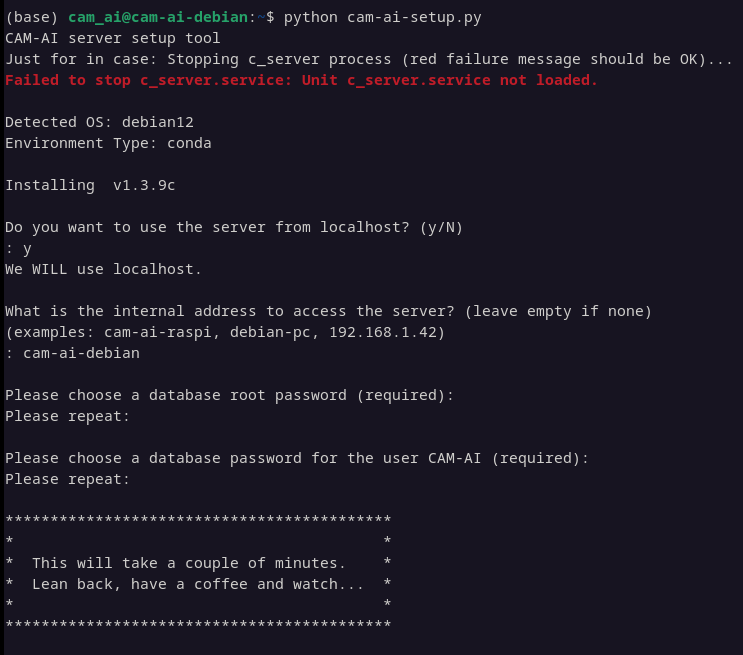
Here are the answers:
- Localhost: Hit “Enter” for no if you do not plan to access your server from a browser on the same machine.
- Internal IP: Enter “cam-ai-raspi”, if this is your server’s name. If not, enter the right server name or the server’s IP address.
- Database password: This is the password for the access to the database. Select one and write it down, in case you need it later.
Next, install nginx:
sudo apt install nginx

sudo ln -s /home/cam_ai/cam-ai/nginx/sites-available/cam-ai /etc/nginx/sites-enabled/
sudo systemctl restart nginx
Now it is time to mount the directory /home/cam_ai/shm for the first time. This will go automatically with the next reboot:
mkdir /home/cam_ai/shm
sudo mount -a
sudo systemctl daemon-reload
To start the server on a Raspi type:
./runserver.sh raspi
To start the server on a PC type:
./runserver.sh pc
Log in
From another PC in the same network, you can now log in by giving your browser:
http://cam-ai-raspi:8000/
If your server has a network name different from “cam-ai-raspi” (“cam-ai-debian for example), use that or the IP address. The initial login information is user=admin password=cam-ai-123.
Done.
What’s next?
- If you plan to train your AI yourself, the CAM-AI server will need a connection to another server that is capable of doing the AI training work. Get an account from our fast server in the cloud. Here is how. Write down your new username and password. You will need it later.
- To connect your camera to your server and your Server to the AI server, you need to do a basic server setup.
- Optional: If you want to use this server for daily use, it makes sense to add the autostart feature and make it autonomous from your PC’s terminal. Here is how.
- Optional: If you want to access your server from outside your local area network, you need to configure HTTPS. Here is how.