
This is the archived documentation of the CAM-AI open-source software for self-hosted installations. It is provided as is and no longer actively maintained. Using CAM-AI in production? Talk to us at cam-ai.de.
docs / cameras / tapo
TP-Link Tapo C200: Configuration
To connect your camera to your network, follow the quick installation guide provided with the camera, as also outlined here. All you need to do is install the Tapo App, click the ‘+’ button to add a new device, select your device from the list, and then follow the on-screen instructions.
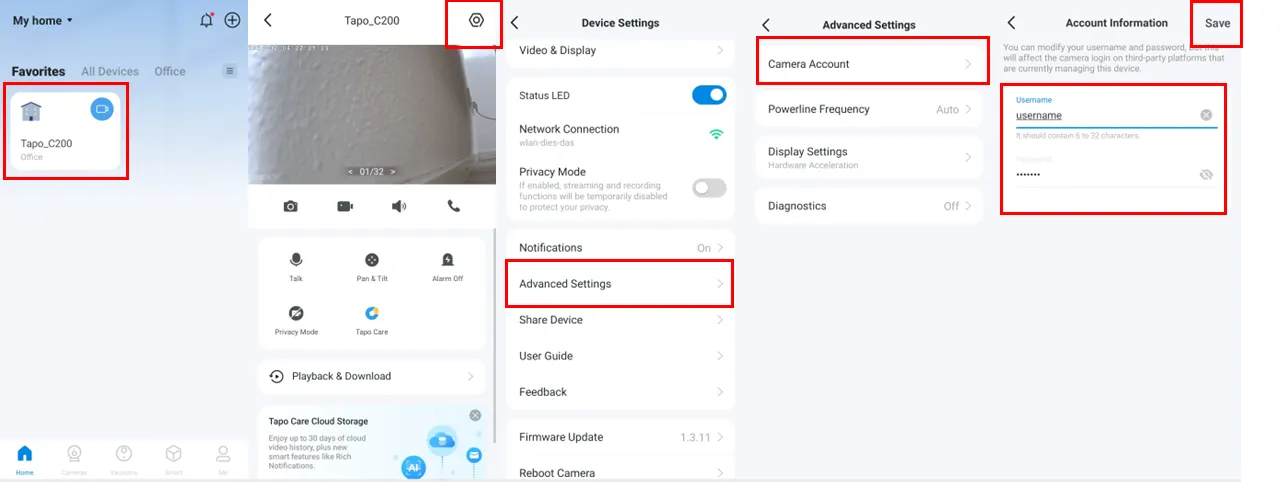
When your camera is successfully connected proceed to add a camera account with username and password as described in Step 1 here. Note this username and password.
Port forwarding exposes your camera directly to the internet. Only forward ports if you need remote access, use a strong, unique camera password, and keep the camera firmware up to date.
Make sure that you have a shared port 554 for this IP on your router, as explained here.
Now you are ready to connect your camera following our instructions for our webserver app or your own server. Your camera type will be available in the list for installation.
Our software will automatically generate the URL for your RTSP stream:
rtsp://{username}:{password}@{domain or IP}:{port}/stream1