We assume that you have successfully installed the CAM-AI system on your camera web server as described here. Now that it’s up and running, it’s time to start using it. Here’s how to get started.
The three software modules that work on each video stream:

If you’ve installed CAM-AI on your camera web server, you’re ready to start using it! The main menu on the left-hand side of the screen is where you’ll find the system’s three modules of video processing. Here’s an overview of what they do and how they work:
1 Cameras
This submenu (click on the main menu button to see it) offers these options:
1.1 All Cameras
Clicking on this option will display all connected video streams (i.e. cameras) simultaneously on your screen.
1.2 Individual Cameras
Click on the name of a specific camera to adjust its settings. Two grey bars below the camera image will take you to two submenus:
1.2.1 General settings
Name: You can change the camera stream’s name, and it will apply to the “Detectors”, “Preferences” and “Eventers” sections as well.
Cam pause: When checked, it stops the video stream until you uncheck it.
FPS limit: This sets the maximum frames per second to process. If you’re using a Raspberry Pi, we recommend setting it to 2.0. Also, consider setting an appropriate FPS limit in your camera’s setup. If you set the FPS limit to 0, the incoming video stream’s speed is not limited.
Feed type: For now we recommend leaving this setting as “Others”
Video url: This URL depends on your camera type, location in the network, and intended use. In most cases, you won’t need to modify the default string.
Once you’ve made changes to the camera settings, click Submit to write the modifications to the database and restart the camera process. By configuring camera settings, you can ensure optimal performance and achieve accurate video processing results on your camera web server.
1.2.2 Mask settings
A camera mask can be a useful tool to customize your camera output by blocking specific regions of the video stream. For instance, you may want to black out a neighbor’s yard that you don’t want to see this area in your images or videos. A camera mask consists of as many 8-cornered patches as you need to cover the desired area. Here’s how to make and use them on your camera web server:
Show: This option displays the mask on the screen without activating it.
Apply: This option activates the mask to block the selected areas. You will see that on your screen.
Edit: Use this option to modify an existing mask. You can drag and resize the patches by clicking on the circles that represent the polygon corners. To delete a patch, double-click on one of its circles.
White marks: This option changes the color of the polygons and circles from black to white to enhance visibility on dark backgrounds.
New Masked Area: This option creates a new rectangular patch in the middle of the screen.
Move to Detector: The detector module also has masks with slightly different functionality (see below). Because mask building is much easier with the camera video as background, we recommend specifying the mask here and then moving it to the detector.
Get started with the camera mask feature by watching this quick video tutorial (no sound):
Double-clicking on any of the dots will remove the masked area.
1.3 Scan for cameras
This is for adding additional cameras after the installation. The process for adding camera streams is described here for your own server and here for the web server application.
2 Detectors
The motion detection module receives the video stream from the camera module, which is a sequence of images. The module then compares each image with the previous one to detect motion. Any pixels that have changed are marked as motion. Rectangular motion areas are forwarded to the eventer module. The motion detection submenu (click on the main menu button to see it) offers these options:
2.1 All Motion Detectors
Clicking on this option will display all motion detector results simultaneously on your screen.
2.2 Individual motion detectors name
Click on the name of a specific detector to adjust its settings. Two grey bars below the camera image will take you to the submenus:
2.2.1 General settings

FPS limit: Set the maximum frames per second to process. If you have already set the frame rate limit in the camera setup, we recommend setting this to 0.
Threshold: Set the sensitivity of the motion detection process. A value of 1 is very sensitive, while 254 is not sensitive at all.
Background delay: Adjust the delay to differentiate between the background and foreground by comparing the last image with an average of several older images. Set to “0” to disable this feature.
Erosion: Eliminate fine patterns of movement pixels displayed on the screen as purple.
Dilation: Increase the size of the remaining areas, which can also simplify the structure by joining some of the areas. The growth areas are indicated as grey.
Max. size: Limit the maximum size of motion areas. It is recommended to leave this at 100.
Max. number: Limit the number of motion areas per frame. It is recommended to leave this at 100.
Once you’ve made changes to these settings, click “Submit” to write the modifications to the database and restart the camera process.
Here is a short video tutorial (no sound) for the motion detection and the parameters:
2.2.2 Mask settings
The mask menu is much smaller than in the camera section. You can only check if you want to show your mask and if you want to apply it. Applying a mask to the detector of a stream does not cover the area from the screens and the recorded videos, but blocks motion detections in these areas.
3 Preferences
As explained above, the detector module cuts out a rectangular part of the image supplied by the camera each time it sees a movement (actually a change of the image).
The camera web server’s motion detector module captures a small, rectangular cutout image from the camera stream whenever it detects any movement. These images can be of various locations and objects captured by the camera. For instance, our example includes a man and a cat moving on the veranda simultaneously but at different positions. The “Preferences” feature sorts these images into different “Events” based on their position and time within the camera image. This means that if two images were taken with a significant time difference or are distant from each other, they will be classified into different “Events.” With this camera web server’s motion detector module and event sorting feature, you can efficiently monitor and organize events in different locations.
Also, each event gets a set of 10 tags after being processed by the image classification module (the core feature of our artificial intelligence). The tags are labeled with the types of possibly interesting content on the pictures: Night, Human, Cat, Dog, Bird, Insect, Car, Truck, Motorcycle, and Bicycle. Each of the tags carries a number between 0 and 1 indicating the likeliness of the presence of an object of the respective type in this event. A high number (close to 1) indicates the AI is very sure about the presence of this object type on the image, a low number means the opposite.
Here is how this works in detail. The “Preferences” submenu (click on the main menu button to see it) offers these options:
3.1 All Previews
Clicking on this option will display all eventer screens simultaneously on your screen.
3.2 Individual camera name
Click on the name of a specific camera to adjust its settings. On the moving screen, you see the active events represented by red and green rectangles. These rectangles are green if certain conditions are met by the content of the images of the event and red if not. Six grey-blue bars below the camera image will take you to six submenus:
3.2.1 General settings
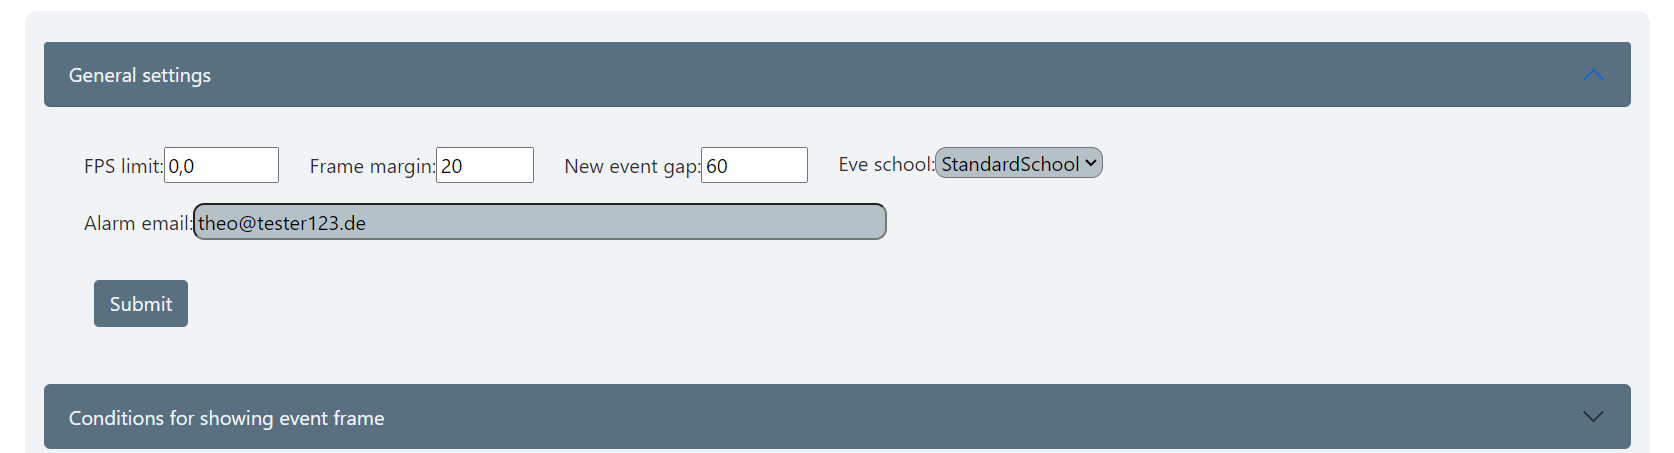
The FPS limit setting lets you set the maximum frames per second to process. If you have already set the frame rate limit in the camera setup, we recommend setting this to 0.
The frame margin setting determines the distance threshold for pictures captured by the motion detection feature. Pictures with a distance greater than this value are sorted into different “events.”
Similarly, the new event gap setting sorts pictures with a time difference longer than the specified duration into different “events.”
You can name the “school” where completed events are moved using the eve school setting. For more details on this feature, please see below.
You can also specify an email address to receive alarm notifications using the alarm email setting.
After adjusting these settings, click “Submit” to save the changes to the database and restart the camera process. With these settings configured, your camera web server can efficiently monitor and organize events in different locations.
3.2.2 Conditions for showing event frame
In this section, you can select the conditions for showing an event frame. In this example, we are interested in the detection of “Human(s)” so we want to see them highlighted in a red frame on our screen:

3.2.3 Conditions for sending to school
Here you select the conditions for storing an event and sending it to “Tagging” (to be found in the classroom feature under “Events” in the main menu. An easy condition could look like this:

This means that sending the event to the “Tagging” system is 60% sure there is a human included in the event’s pictures. Using boolean algebra you can set up more complicated sets of conditions like this one:
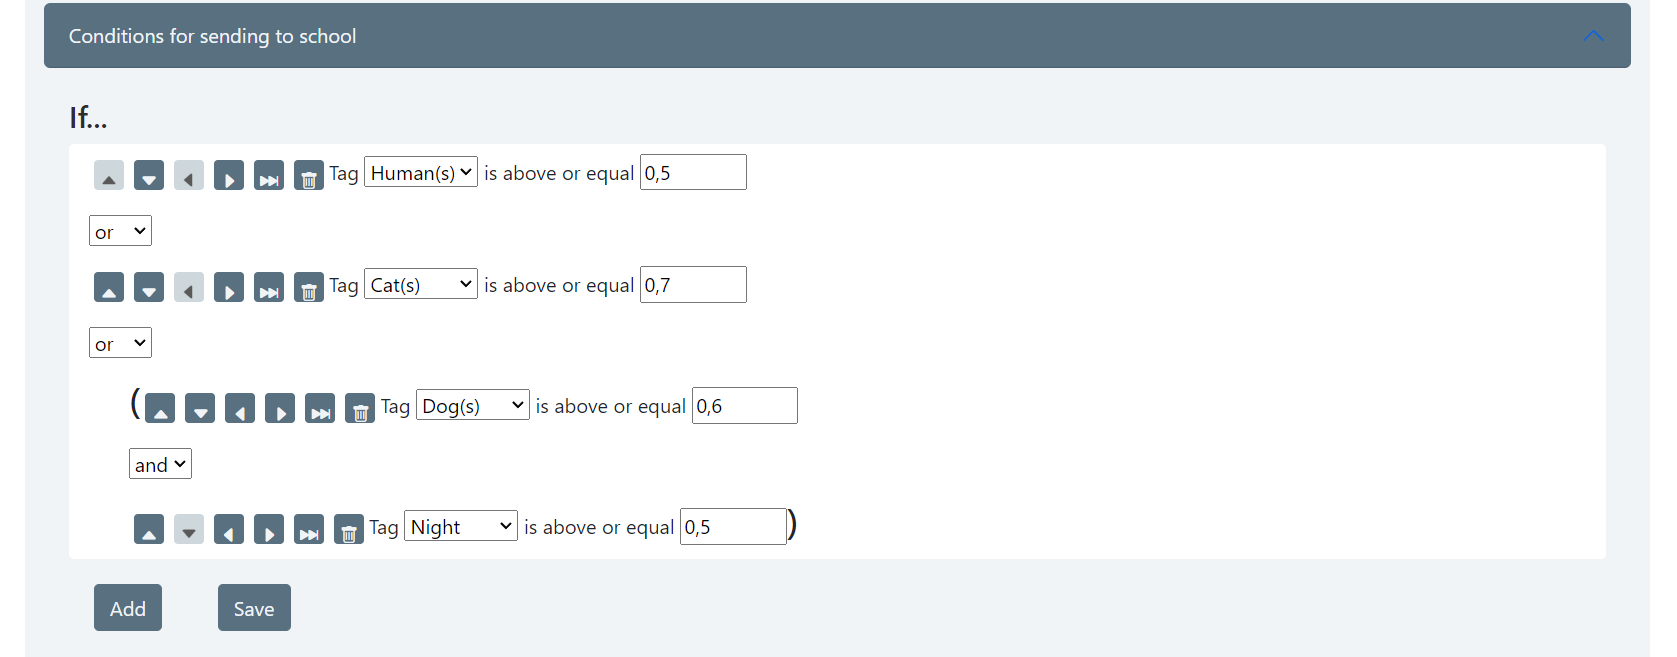
This does the following: Send the event to the “Tagging” if there is a human, a cat, or a dog at night. Feel free to experiment with this mechanism. Clicking the “Save”-button will set up your chosen conditions.
3.2.4 Conditions for recording video
The way you set up sets of conditions is the same, but the action if the conditions are met is different: A video will be recorded if these conditions are met.
3.2.5 Conditions for sending Email
The way you set up sets of conditions is the same, but the action if the conditions are met is different: An alarm email will be sent to you if these conditions are met. Provided, you have entered your email address at 3.2.1. In case of your own server installation make sure your SMTP configuration is correct. Here is how to do this.
3.2.6 Conditions for Alarm
The alarm module is currently under development. Experienced users will have the capability to integrate any alarm routines (e.g. in Python) from this module. Established email alarms remain unaffected by this selection.
4 Events
All events that were collected by the selected criteria of “Preferences” are stored in the “Events” section. They are sorted by cameras. In this case, camera “Outdoor” is active.
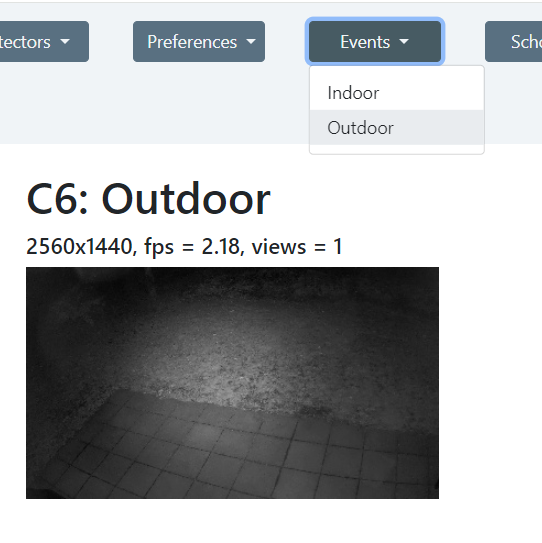
Click on the name of the camera to see more:
4.1 New Events
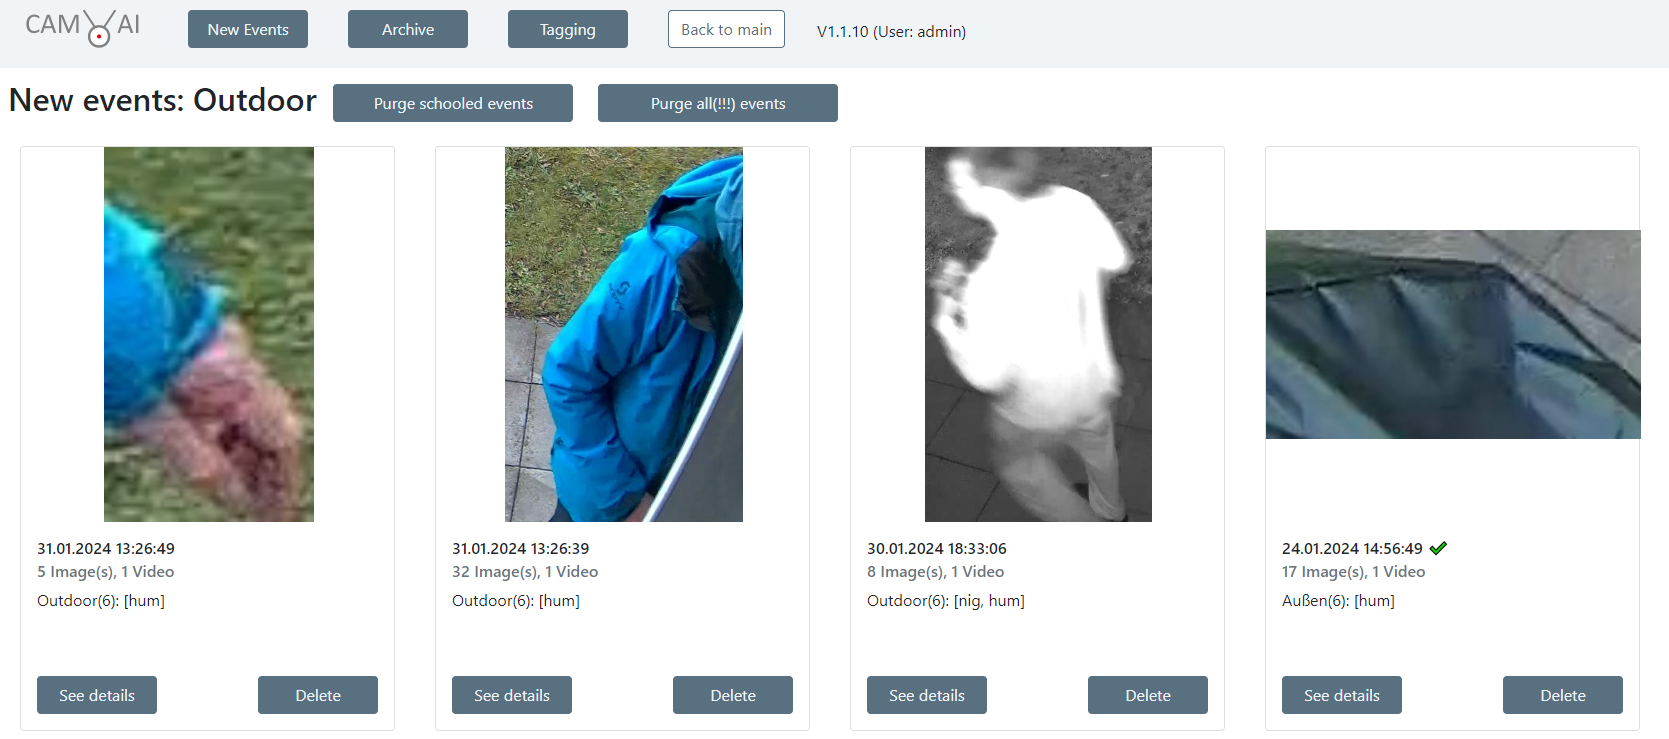
This is an illustrated summary of what happened since your last cleanup. You can check the details (Images, video) by clicking on “See details”.
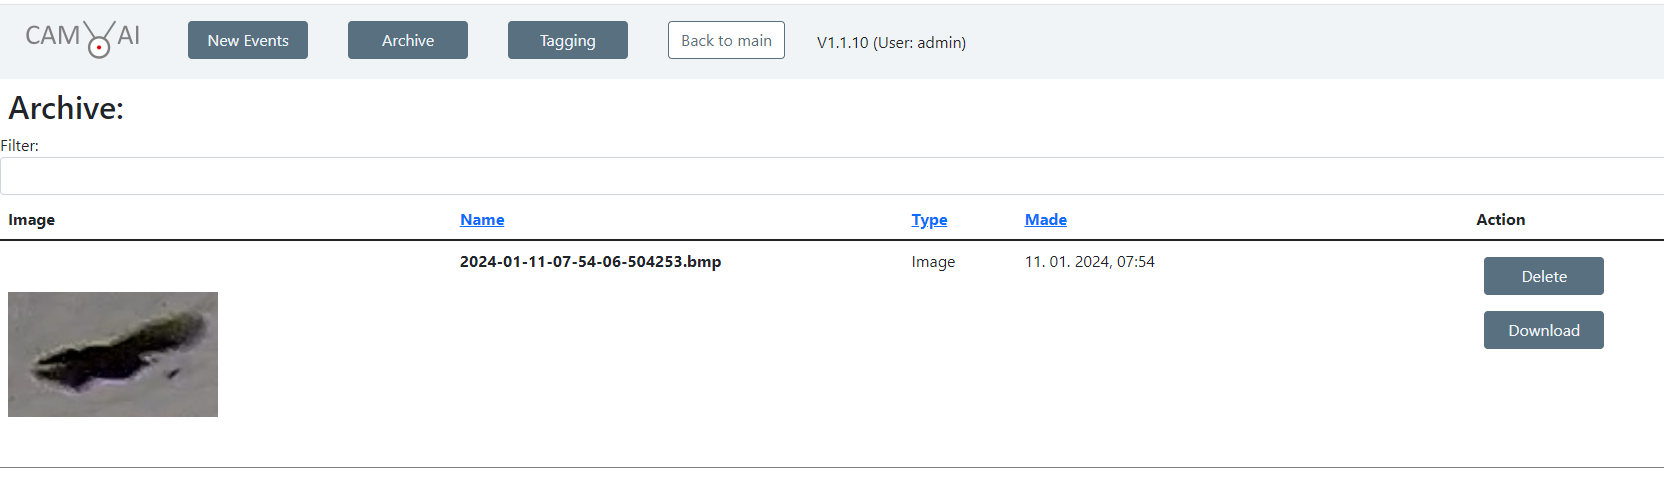
4.2 Archive
Here you can manage your archived images and videos.
4.3 Tagging
In “Tagging” you can check the images that were sent according to your “Preferences” and the result of the image classification coming from the AI. If the AI makes mistakes, you can correct these here and submit the images with the correct tags. After the next AI Training session the classification will improve based on these lessons. Here is how this works:
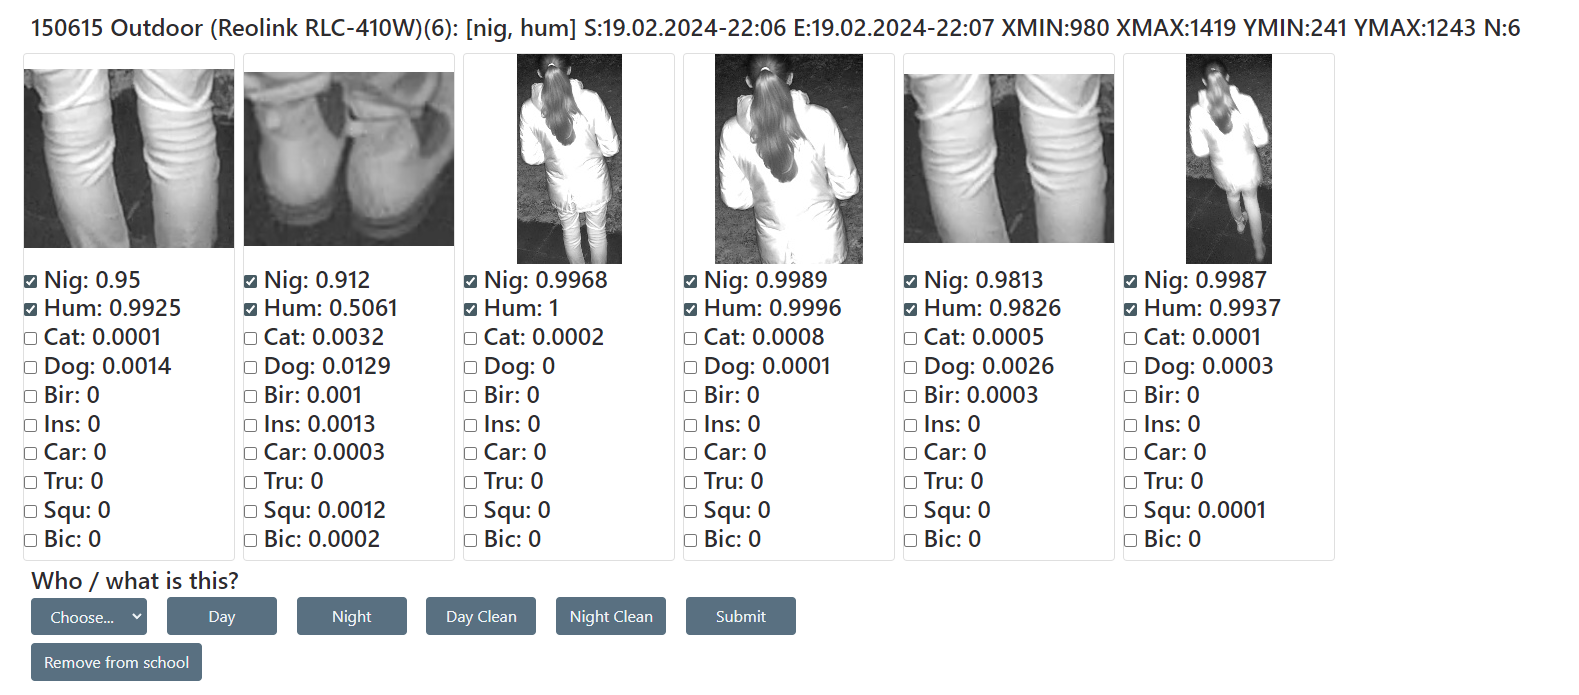
With the images, you see the 10 tag values per image, including the system’s indication of what the AI saw on the image. To correct a mistake you check or uncheck the relevant checkmarks and click “Submit” when you are done. Now all the images of the event will be copied into school so they are ready for the next training. There are different options to make the tagging process more efficient and comfortable: 1.) Choose a category that will apply to all pictures. 2.) Remove all night tags. 3.) Add night tags to all images. 4.) Remove/Clean all tags, including night tags. 5.) Remove/Clean all tags, and add night tags to all images.
5 Schools
You select the school you want to work on and will get to this:
5.1 Review
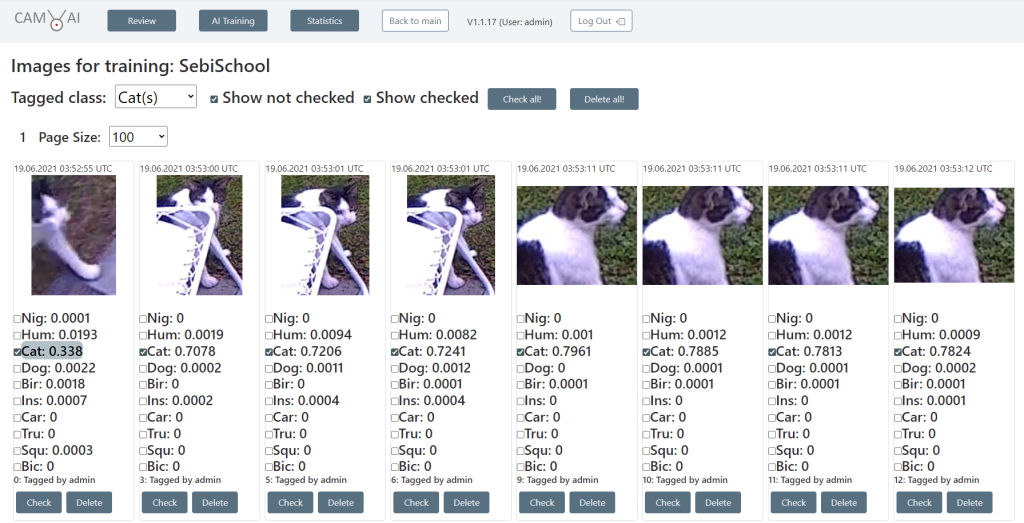
Here you can see all the images that belong to this school. You can filter the Images by a specific tag and by whether the images are checked and/or unchecked. You can check or delete single images or all images.
Most importantly, you can edit the final tagging before checking the images to send them to AI Modeling.
5.2 AI Training
In this section, you will find all the settings for your next AI Training.
All images that first have been tagged in “Tagging” and finally have been checked in “Review” will be ready for training. Once you have adjusted to your favorable settings you can start the training by clicking the “Train AI Now!” button. Your position in the Queue will be shown on the top.
When your training has been launched successfully you will find the status and all the information on past trainings in the table at the bottom. There will be more content on optimizing these settings and outcomes.

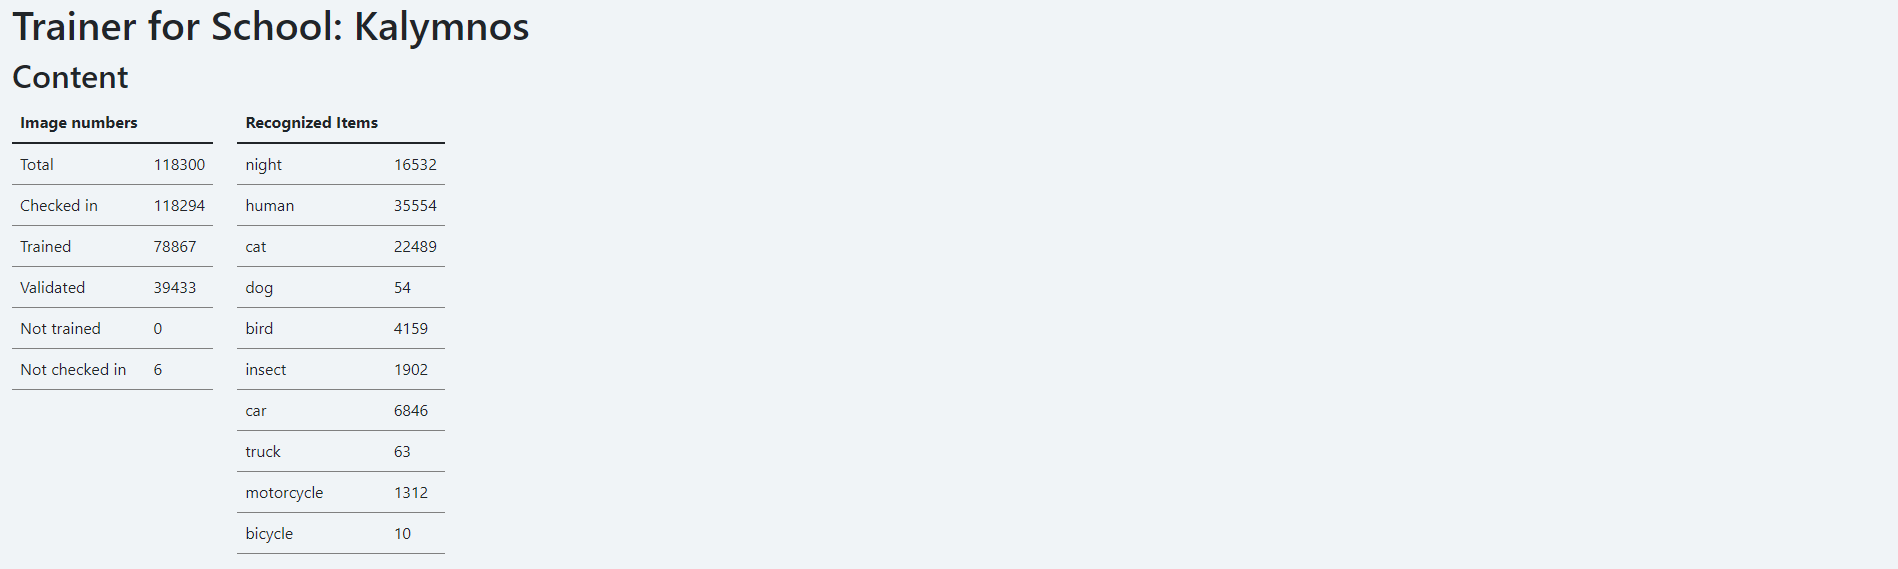
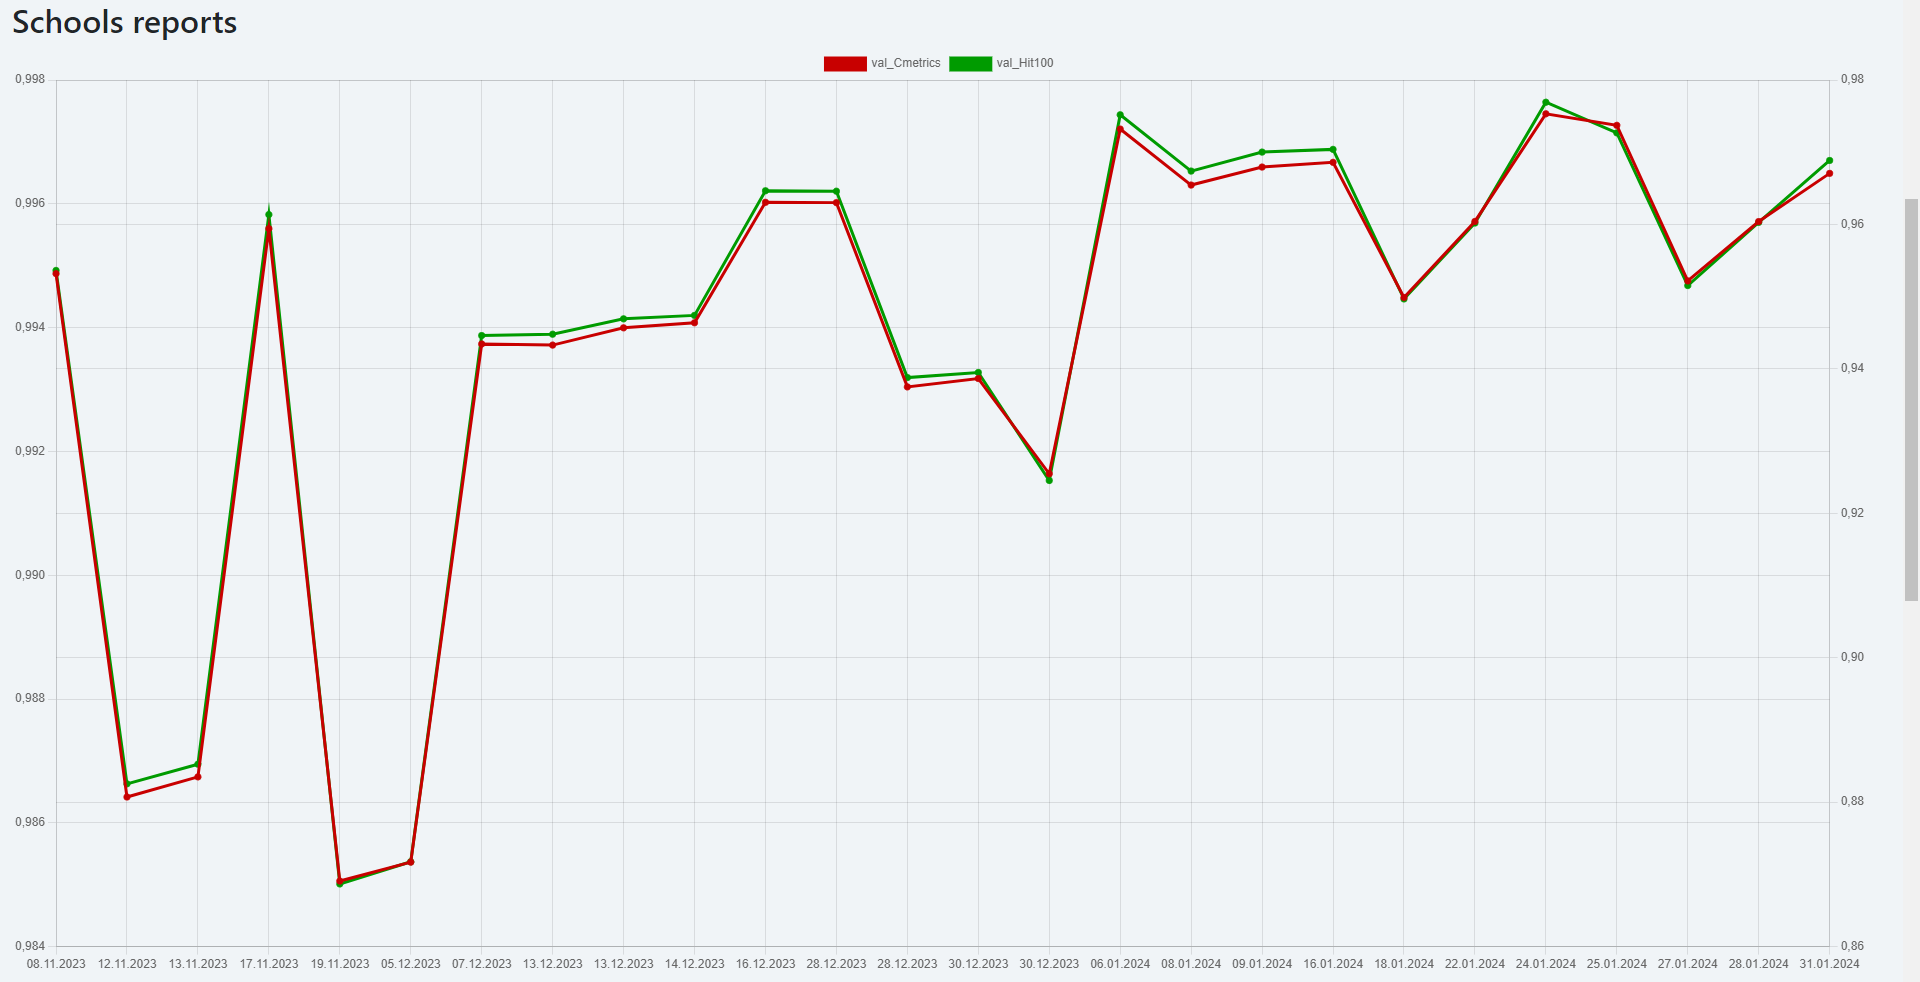
5.3 Reports
Here you will find all statistical information about the school and past and running training processes.