If your camera has been used before, we recommend putting it back in the factory default state. Here is how: You connect your camera to your router (via network cable) and electric power (via power cord), giving 3 minutes for booting. Then you press the reset button for ten seconds. Details can be found here. After a while, a device with the name “Camera1” will show up in your router’s list of connected devices. Write down this device’s IP address (example: 192.168.0.42).
For the next steps, you need the Reolink client software, which is available for Apple- and Windows PCs. Get it here and install it. DoubleClick on the Icon labeled Reolink, then click on the plus sign in the circle near the top left corner. That will bring you here:
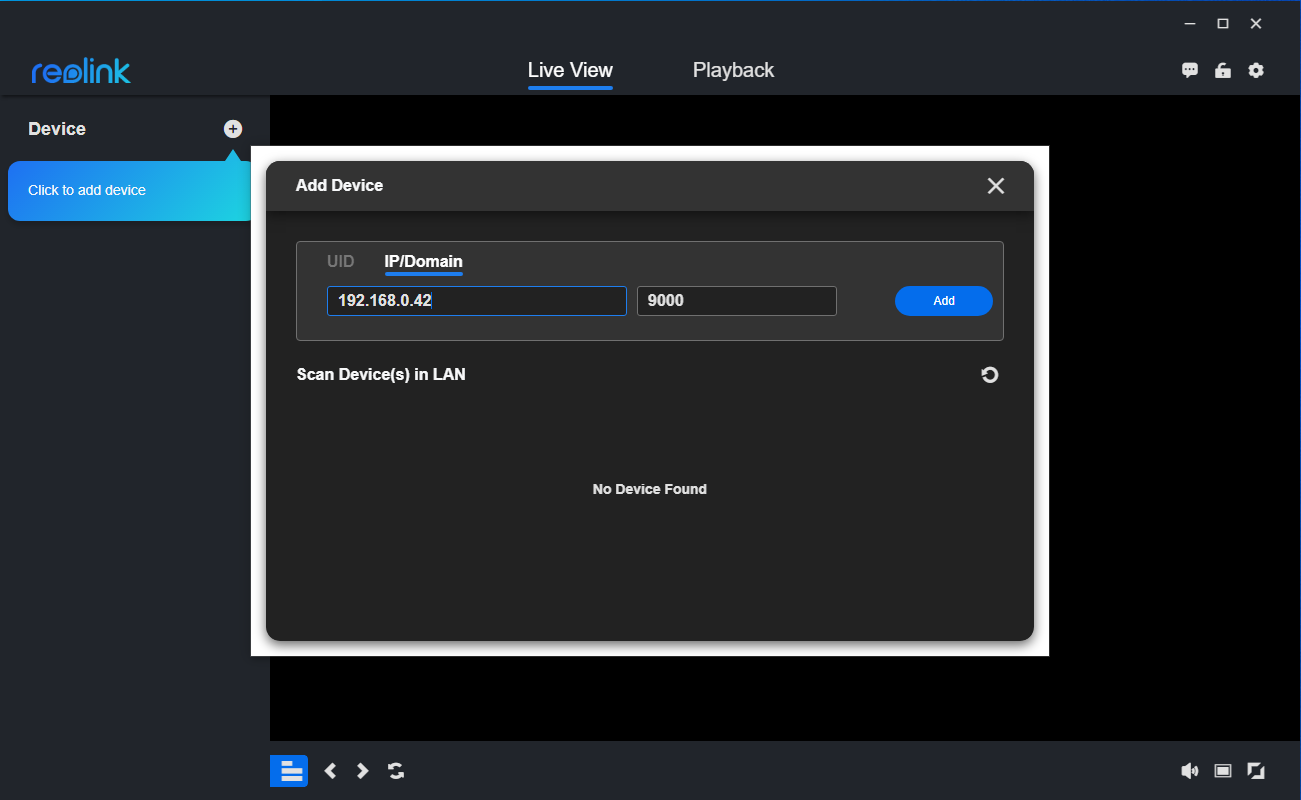
Type the IP address you just noted and click on “Add”:
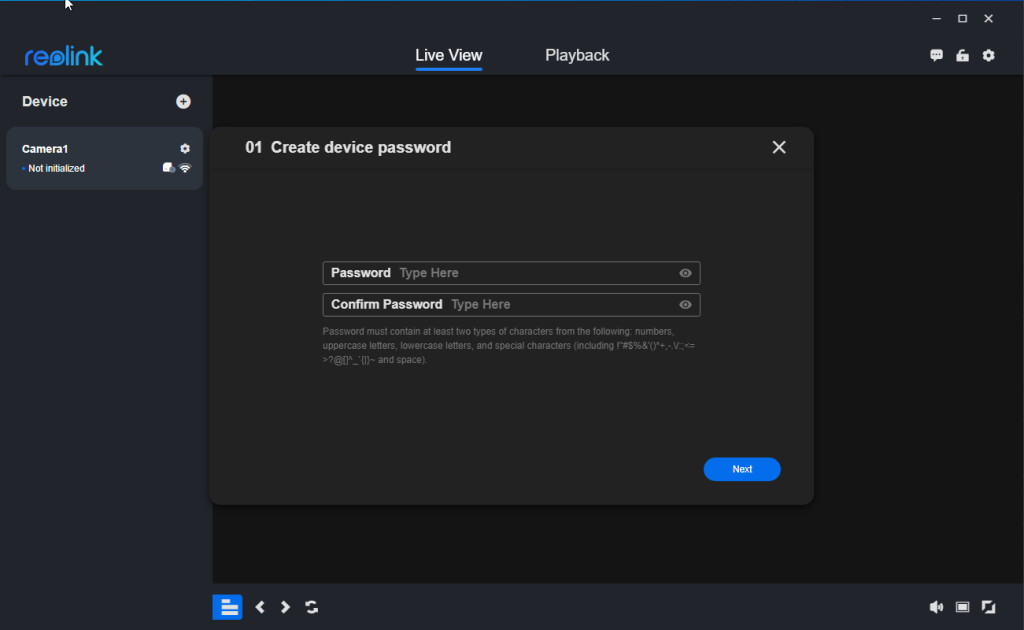
Select your admin password. Type it two times and click on “Next”:
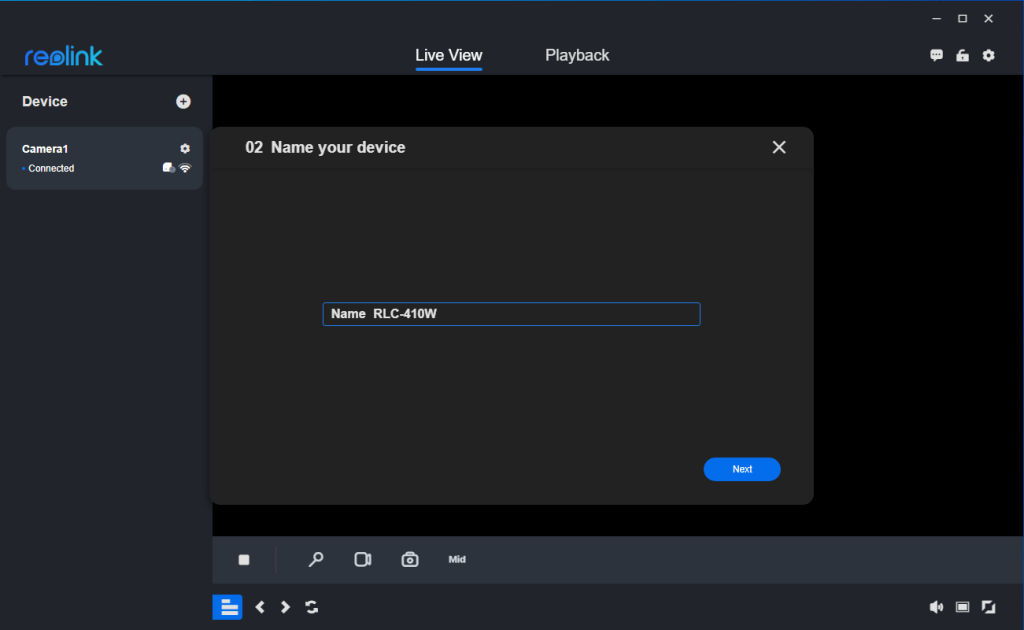
Give your new camera a name and click on next. Then click on “Finish”. This will get you here:
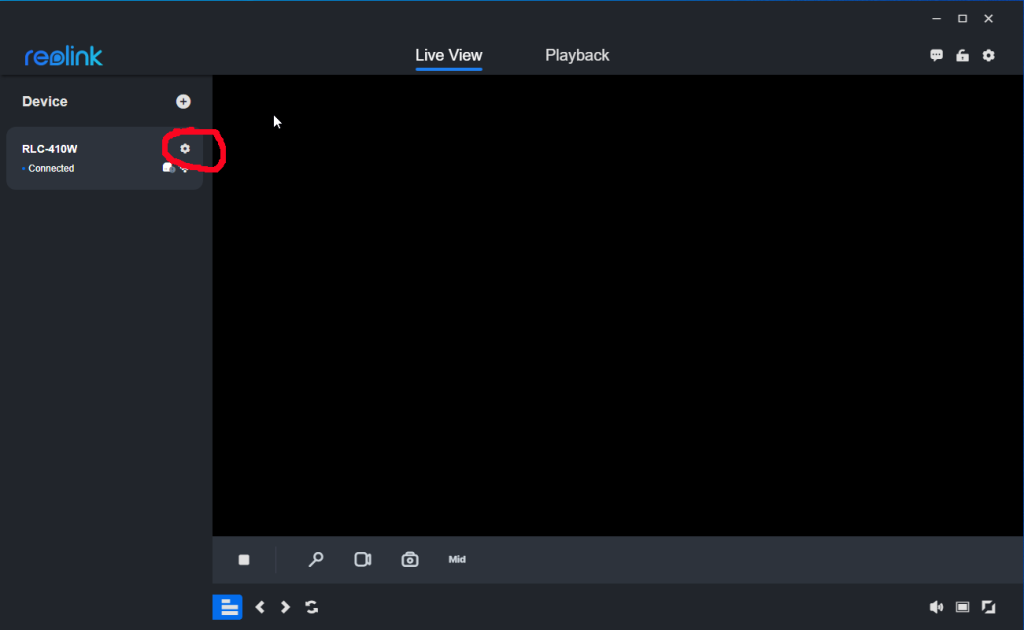
Click on the gear, then on “Stream” and then on the gear symbol associated with “High/Clear”. Change the settings to the values from the following screenshot:
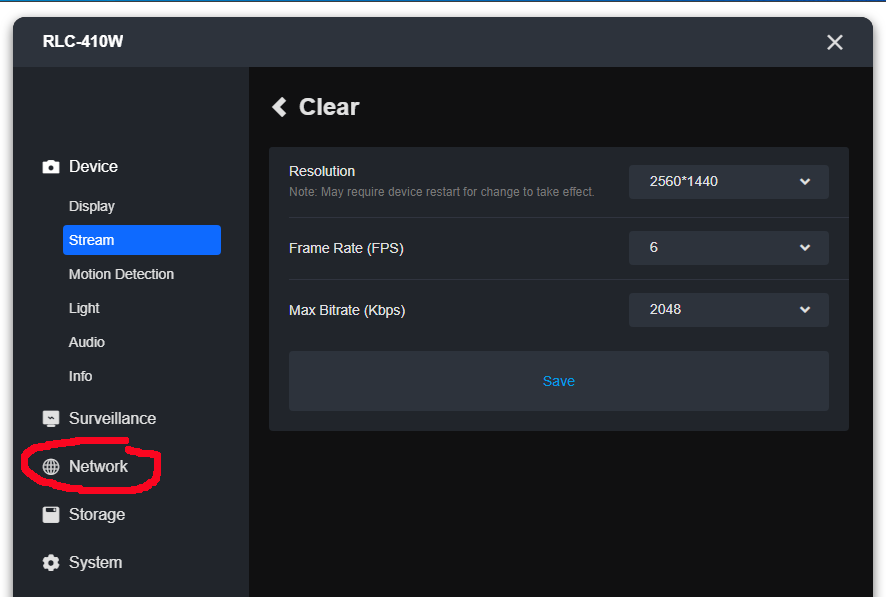
Click on “Save” and then on Network:
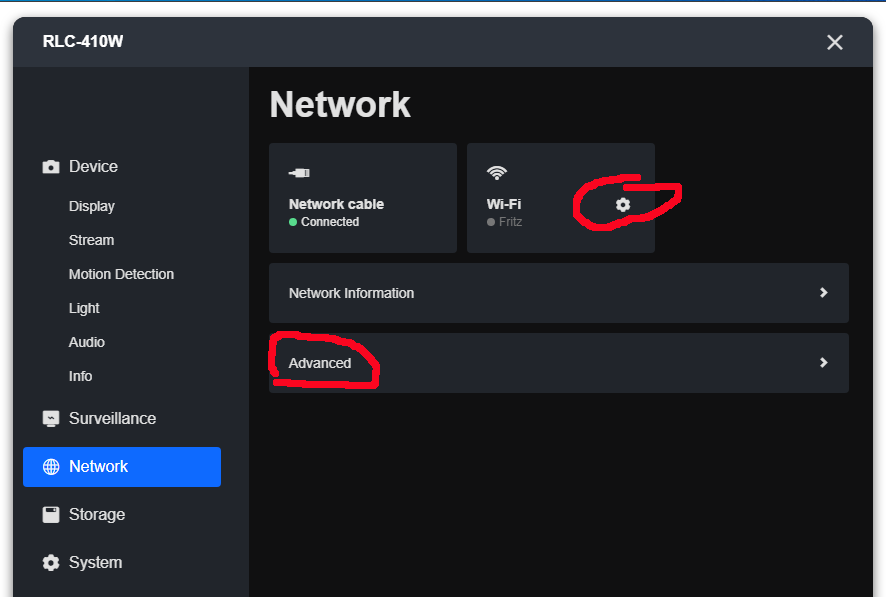
Click on the Wi-Fi gear, select the connection you are using, enter the password, and click “Connect”. Then hit the “X” on the right top to go back. After that click “Advanced”:
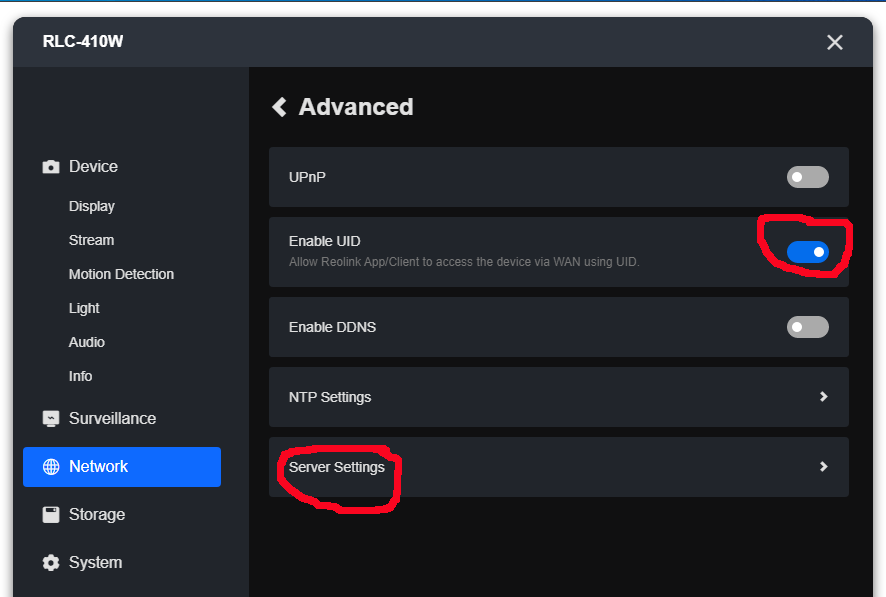
Now you can decide if you want to leave UID switched on or not. The advantage of UID: This enables the Reolink app on your mobile phone. Disadvantage: You never be 100% sure, where else your camera streams go. The next item to work on is “Server Settings”, and here is how to set them up:
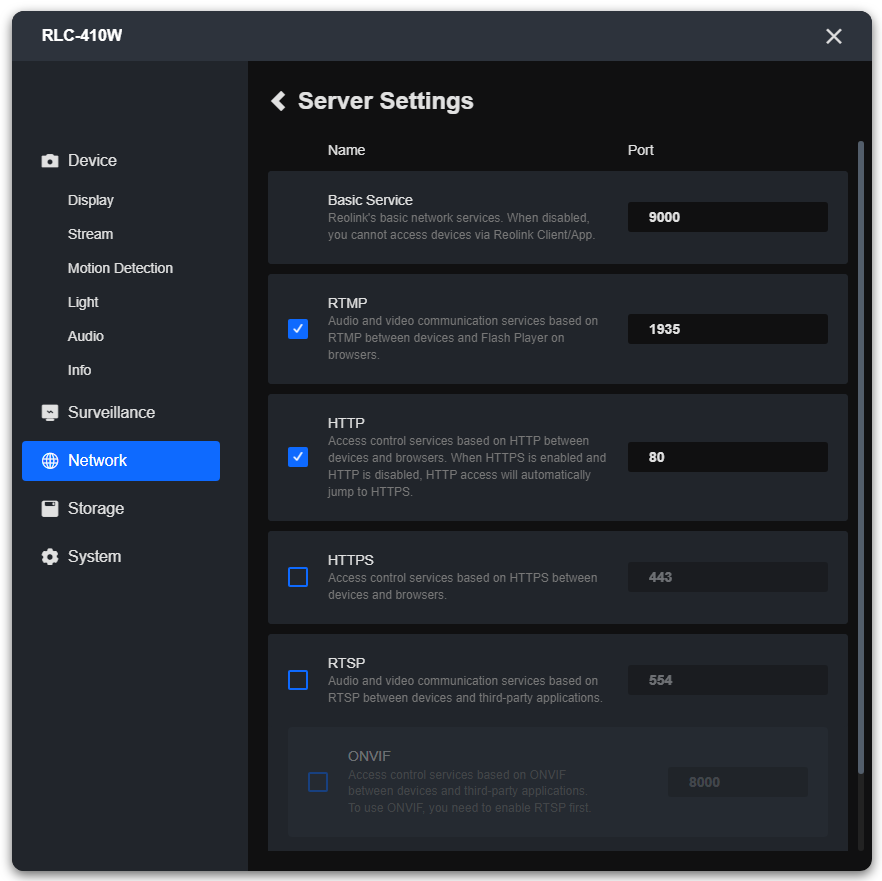
For the last item you click on “System” and then on “User Management” in the bottom of the left sidebar:
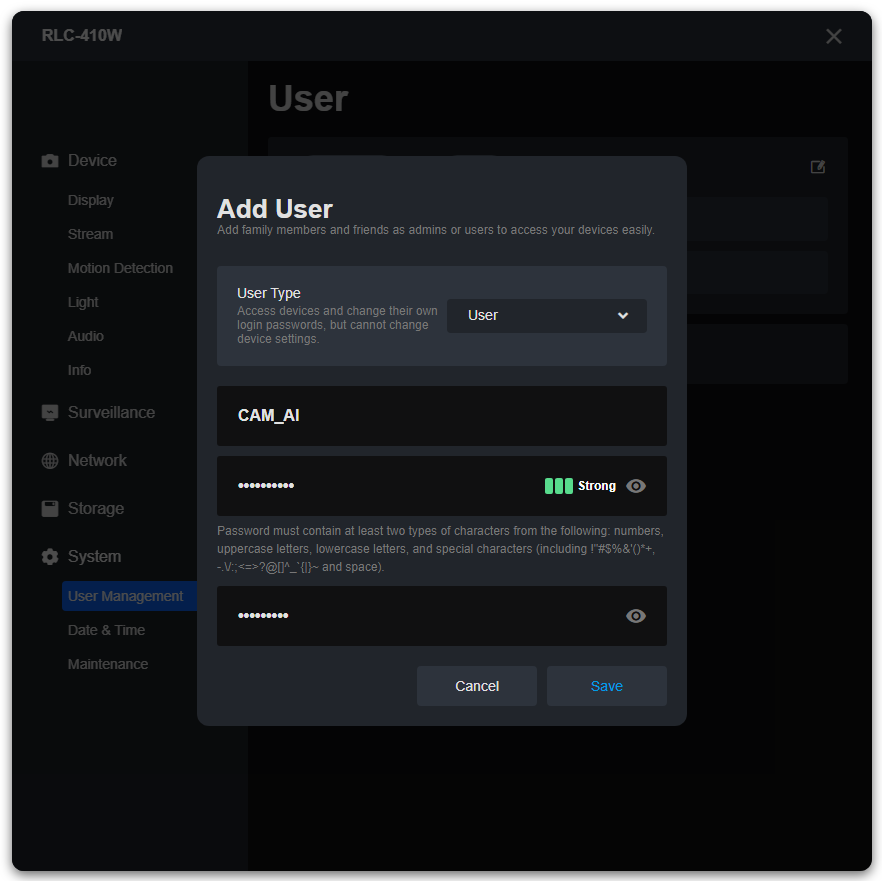
You add the user that CAM-AI is later going to use and click save. Write down the username and password you selected, you will need them later. Also, write down for later: The preferred data transfer protocol is RTMP, using port 1935. That’s it, your camera should now be prepared to connect to CAM-AI. You can close all open windows, pull the network cable between your router and your camera, and find a good place for your wireless device. Be aware that the IP address might now be different. Make sure that you have a shared port 1935 for this IP on your router, as explained here.
Now you are ready to connect your camera following our instructions for our webserver app or your own server. Your camera type will be available in the list for installation.
Our software will automatically generate the URL for your RTMP stream:
rtmp://{domain or IP}:{port}/bcs/channel0_main.bcs?channel=0&stream=1&user={username}&password={password}