Getting the right server hardware for camera artificial intelligence
To set up a CAM-AI server you need to get a Raspi 4 or Raspi 5 with a minimum of 4GB RAM. Raspi 3 will not work. If you did not buy a complete kit, you also need to get a power supply, a case, and an SD card.
- Power supply: We recommend using the official Raspberry Pi part; it is powerful enough even for high-load operations.
- For our application, we recommend an aluminum housing case with passive cooling, like this one, for example.
- Raspis are quite sensitive when it comes to cheap or slow SD cards. We had issues with one Raspi 4 freezing every Monday morning because of a too-slow SD card. Ensure that your SD card has a minimum sustained write speed of 30 MB/s, typically denoted by a small “3” inside a stylized “C” on the card. To guarantee sufficient disk space for the system, opt for a storage capacity of at least 32 GB. For significant video files, we recommend opting for 128 GB to accommodate plentiful storage needs. We can recommend this SD card.
Getting the right operating system
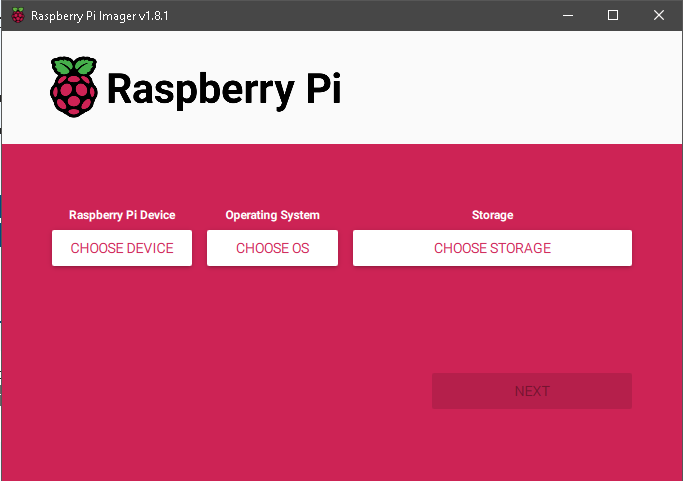
We recommend installing CAM-AI on a freshly installed Raspi-OS. Here is how you can get that: Go to raspberrypi.com and download/install the Raspberry Pi Imager on your working computer (PC). The software is available for Ubuntu (also works with Debian), Windows, and MacOS. Put the SD card for your Raspi into your PC SD drive, then start the imager:
Choose “RASPBERRY PI OS LITE (64-BIT)” as the operating system. Please do not choose any other version. At present, you will find that in the submenu called “Raspberry Pi (other).
Also, you have to choose the right SD card reader/writer. Next, you click on the gear and get to this menu. If you stick with our suggestions for hostname and user name (‘cam-ai-raspi’ and ‘cam_ai’), your setup will be compatible with all of our tutorials:
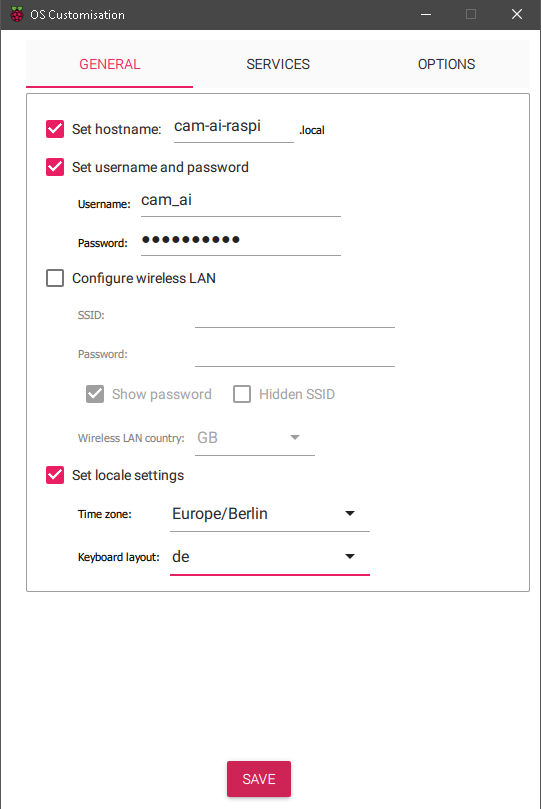
Here is a couple of settings you need to change:
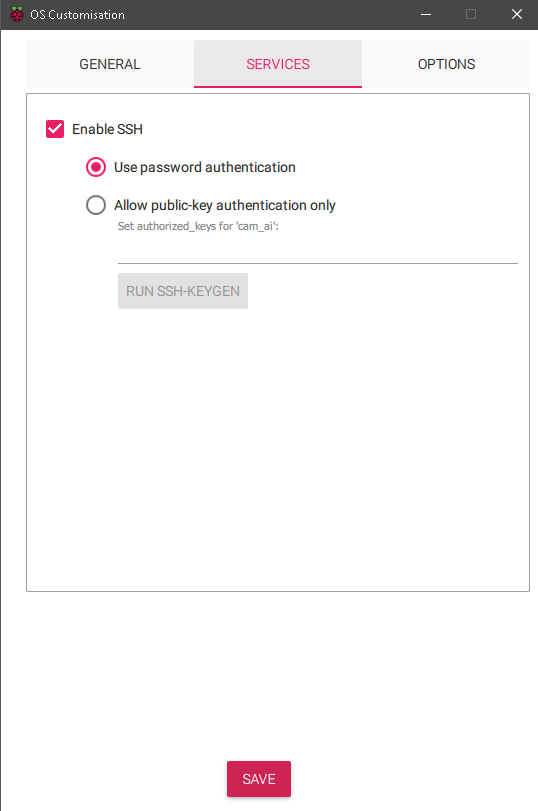
- Activate SSH with password authentification, user cam_ai.
- If you have chosen a metal housing with passive cooling (our recommendation), wifi might be difficult. We recommend to leave it switched off.
- With these settings you create the cam_ai user and write down the password. You will need that later…
- Setting the time zone and the keyboard layout is helpful in case you want to connect a keyboard later.
Store these values and then hit the “Write” button… Writing the SD card and verifying will take a minute or two. Then disconnect the Raspi from power, and move the SD card from your PC to the Raspi. Then connect the Raspi with a network cable to your router and reconnect the power. Give the Raspi a little time (+/- 3 minutes) to reboot.
When the reboot is done, open a terminal on your remote computer. Then enter this:
ssh cam_ai@cam-ai-raspi
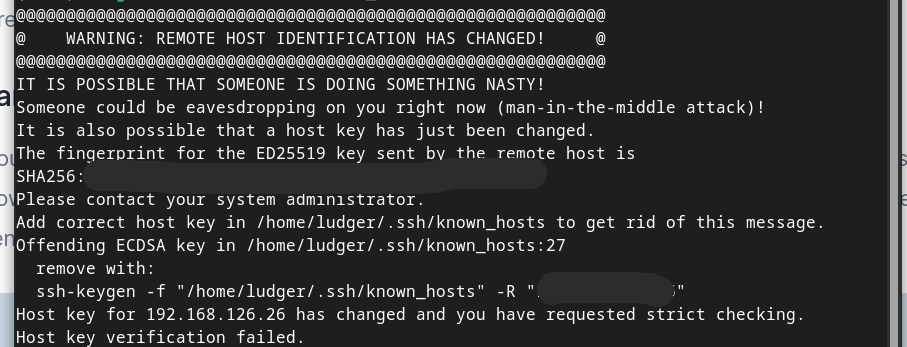
If you get this warning table, this is probably because you have done other tasks with the same server in the past. Fix it with entering:
ssh-keygen -R "cam-ai-raspi"
…and then try again. If this does not work, use the line beginning with ssh-keygen from your screen.
If you are using an Apple computer (MacBook etc.) as a Terminal to do this, this might not work. In this case, go to your home directory, change to subdirectory /.ssh (after making hidden directories visible), and edit the file “known host”. Delete all lines related to your CAM-AI server.
If you are asked about the authenticity of your fingerprint (see example below), answer with yes.

Next you install Miniconda, that will take care of your Python environment:
wget https://github.com/conda-forge/miniforge/releases/latest/download/Miniforge3-Linux-aarch64.sh
bash Miniforge3-Linux-aarch64.sh
This installation script is a little odd. First you press Enter to start installation. After reading the license agreement you hit Ctrl-C and Enter again. After that you confirm all other questions with either yes or Enter for default (the installation directory).
rm Miniforge3-Linux-aarch64.sh
source ~/.bashrc
conda create --name tf python=3.11
Now you can start the CAM-AI installation from your PC terminal (see this tutorial).