Configuration of the server for camera artificial intelligence
After the successful login, you should see this in your browser:

Now you click on the “Tools” button and then on “Link Worker(s)”. That should bring you here:

Here you can enter the URL of the CAM-AI-Server you want to. The example here is our test server. Click on “Check Server”.
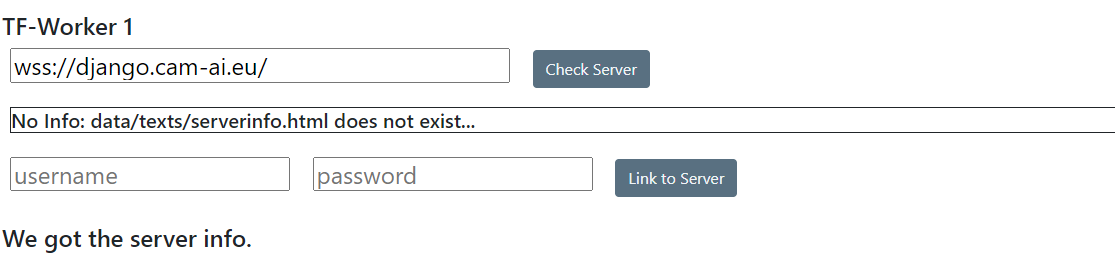
The server is ready to process your connection. The string (here: “This is an example…”) should give you some specific information for this server. You enter your username and password (that you got from registering with that server) and click “Link to Server”.

This indicates a successful connection. So, we are done with this part.
Connecting a camera for artificial intelligence
Now you click on the “Cameras” button and then on “Scan for Cameras in Network”. That should bring you here:
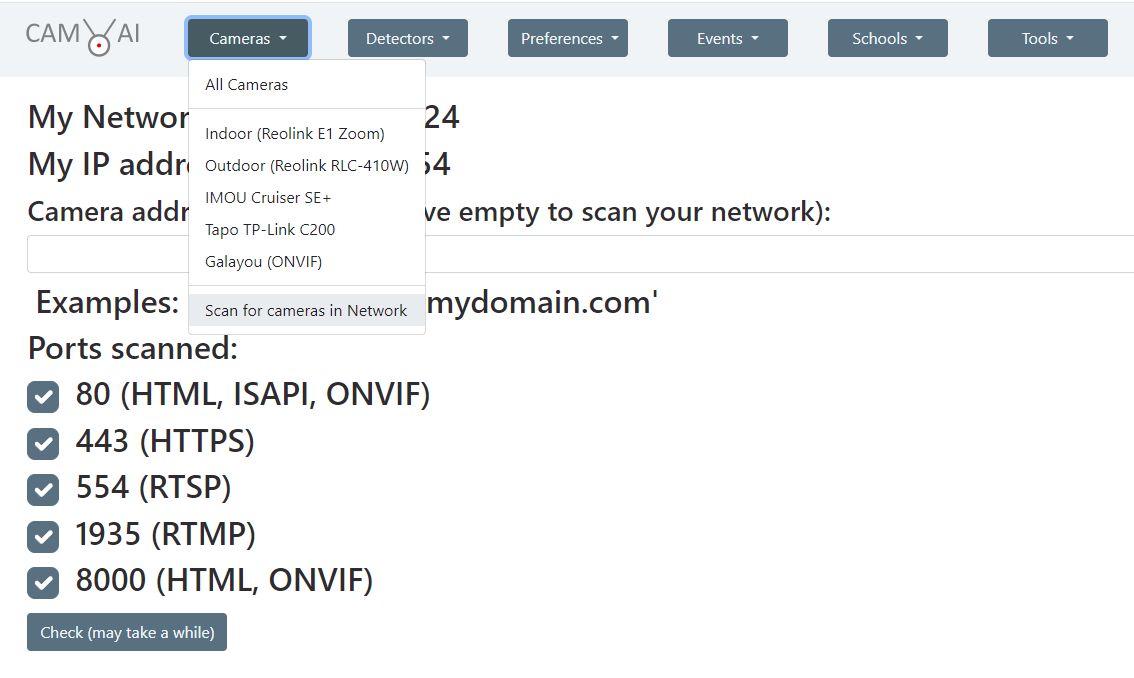
If you know the IP address of your camera (or if the camera you are looking for is in a different network) you can enter it in the text field labeled “Camera address”. If not, you can have your server scan your local network for devices that offer connections on port 1935 (preferred) 80 or 8000 (that is where most of the cameras are). Then, click the “Check” button. Please be aware that the network check may take some time before your devices appear:
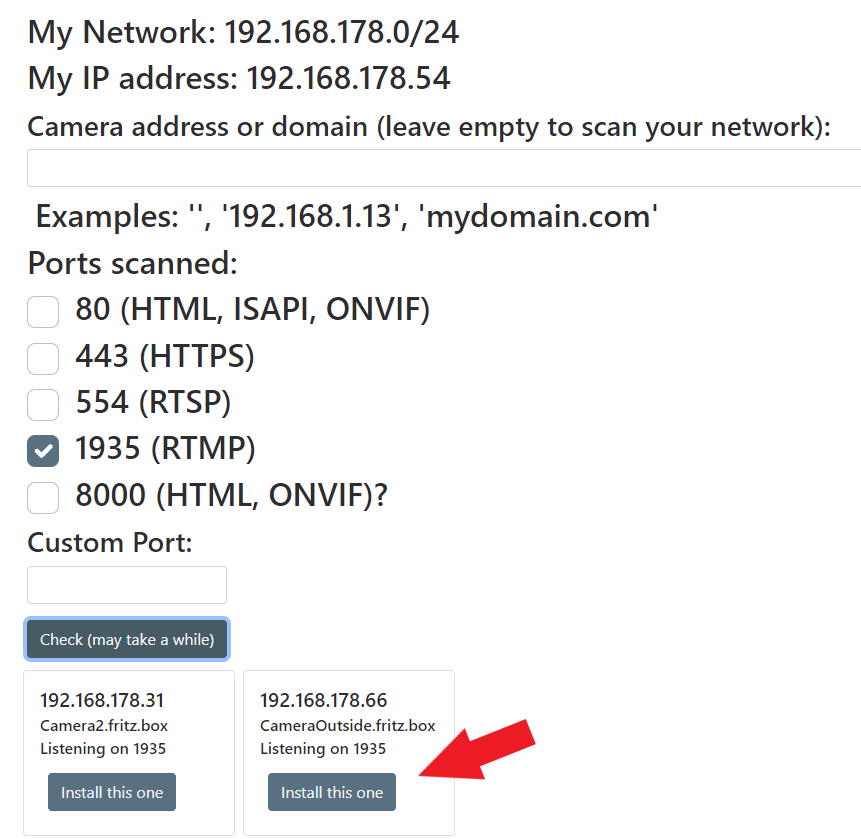
(The custom port function is designed for external ports and is not required for cameras within your network.)
You should be able to find and identify your camera in the boxes at the bottom of the screen (here we have just one box). You select “Install this one”.
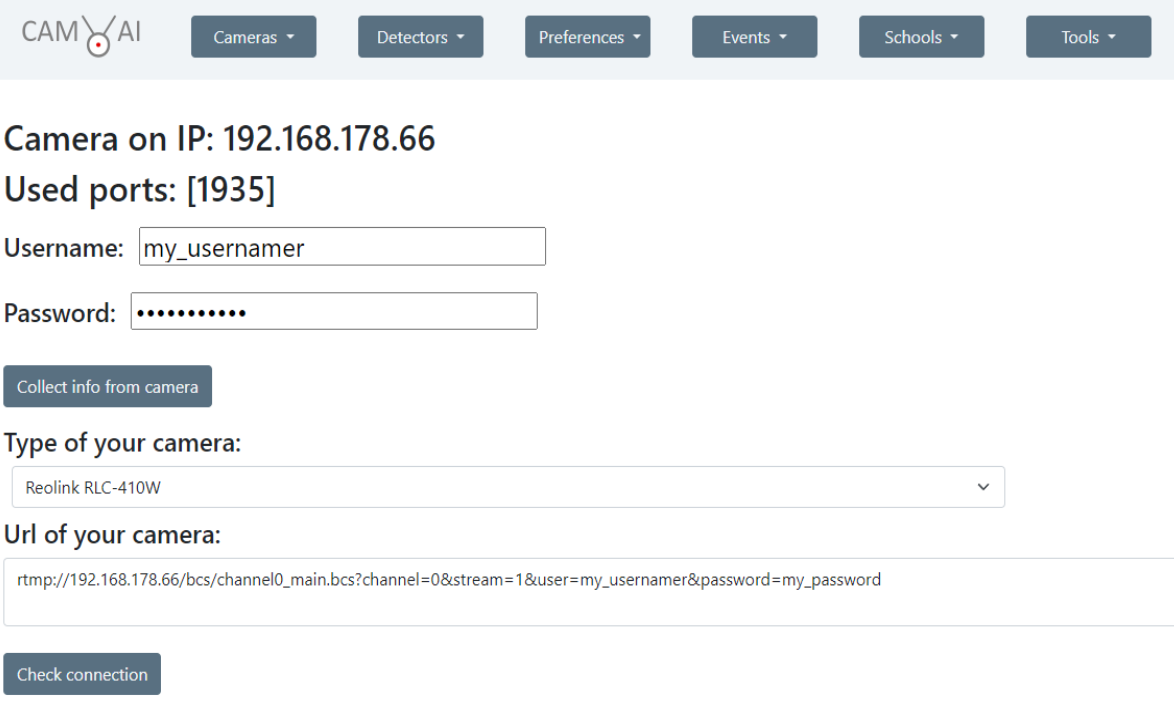
Then you enter the user name and the password configured in that camera.
Now, there are three options to connect your camera:
1.) Your camera type is in the dropdown menu: Select your type and the URL for the camera gets automatically composed.
2.) Your camera is not on the list: You have the option to enter the stream URL directly. In case your camera supports streams (like e.g. RTMP or RTSP), search the URL of your stream on the website of your camera or in related posts to this topic. Make sure the URL contains your individual username and password.
3.) If options 1.) and 2.) were not successful or if you want to use the PTZ features of your camera, you can collect the needed information from the ISAPI- and the ONVIF interface of your camera (if supported) by pushing the “Collect”-button:
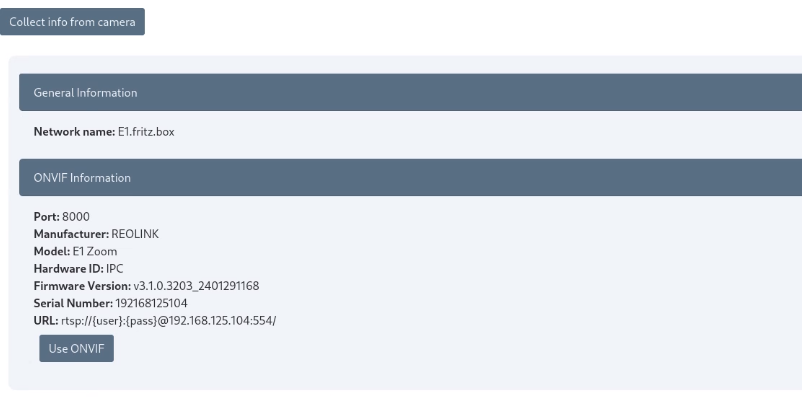
Now, you can choose from the control modes (ISAPI or ONVIF) that your camera supports. Again, the camera URL is composed automatically. Now you can connect to that camera for the last step by clicking “Check connection”:
Next, you get a list of available video and audio modes from that camera.

Once you are done selecting, click “Install this camera” (may take up to 2 minutes).
Now, click once more on “Cameras” in the menu. Wait for the camera image to show up.
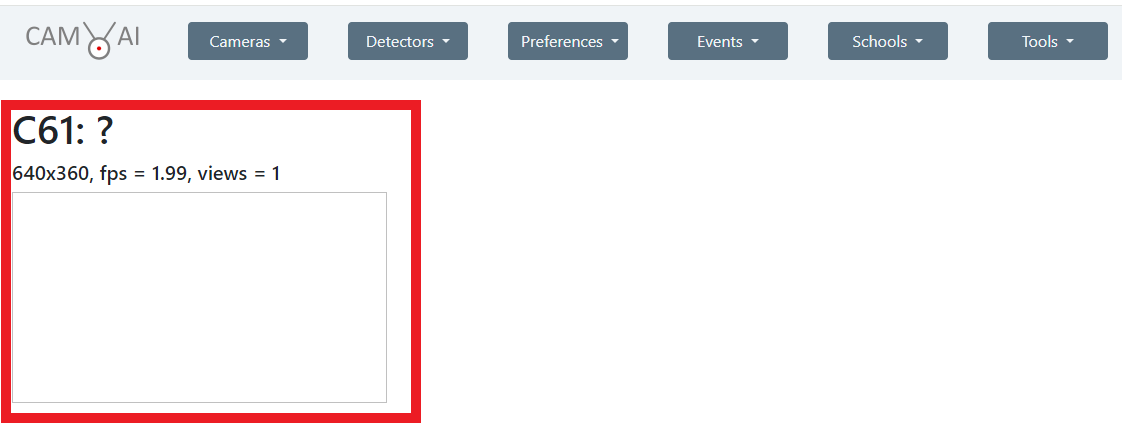
Click in the box under the name of your camera. That should bring up a live feed of your camera to your screen. Now you can change the name of “NewStream” under “General Settings”.
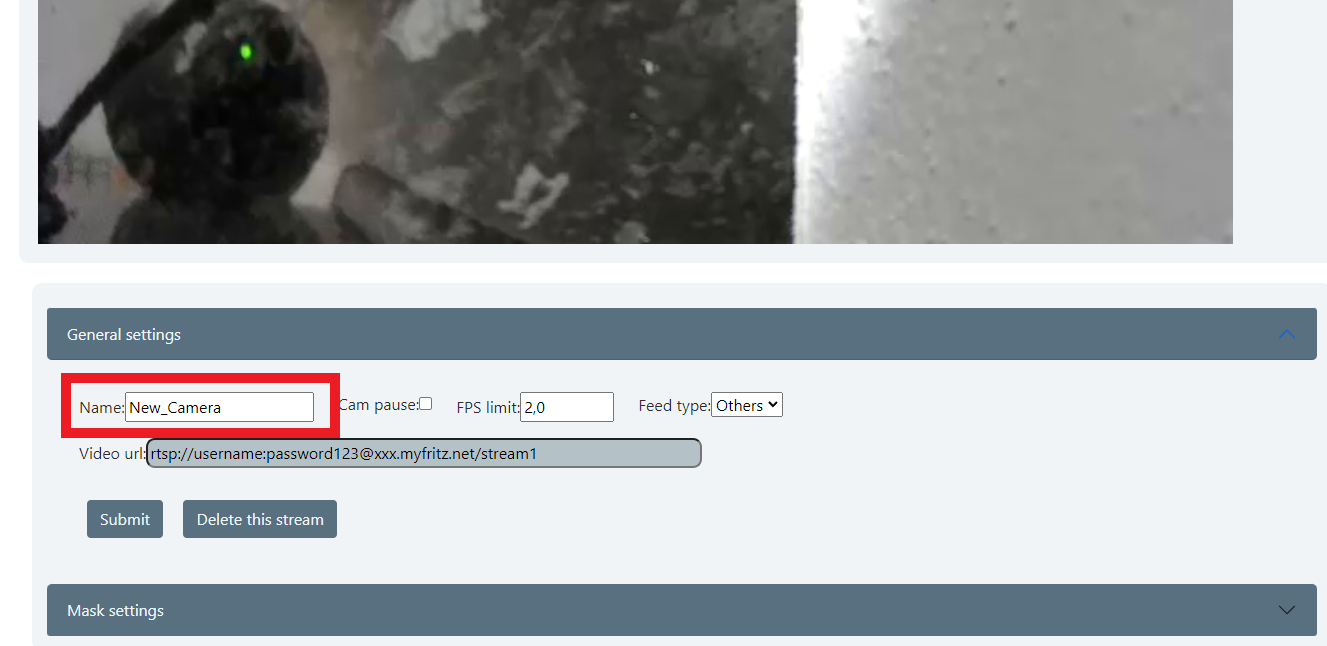
Your new camera stream is using artificial intelligence in standard mode, operating on a standard model (or “school”). To improve the accuracy of object recognition, you can set up your own school, train it on your camera, and use it.
Once you are done installing, you might want to continue reading the user manual.